Last Updated on April 5, 2026 by Peperomia obtusifolia
Quick answer: Black spots on Peperomia obtusifolia almost always indicate one of seven underlying problems — overwatering and root rot, fungal disease, bacterial leaf spot, sunburn, cold damage, pest activity, or nutrient imbalance. The appearance and texture of the spots, combined with a quick check of the plant’s recent conditions, usually narrows the cause down quickly. Most affected plants recover fully once the root cause is corrected.
How to use this guide
Start with the diagnosis table below to match your spots to the most likely cause, then jump to the relevant section for a detailed explanation, targeted treatment steps, and guidance on preventing recurrence.
Quick diagnosis: what do the spots look like?
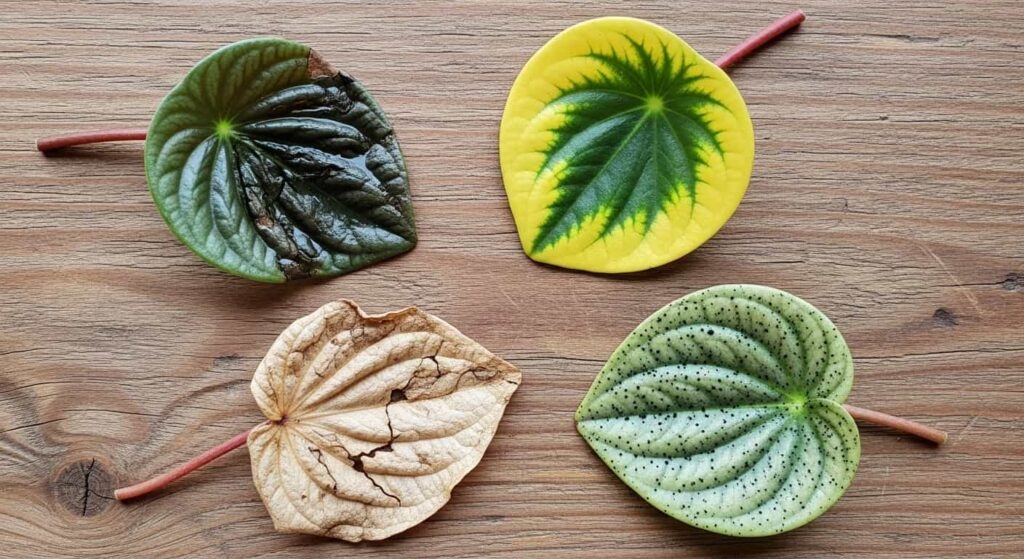
The physical appearance of black spots is the fastest diagnostic clue available. The same pathogen or stress factor produces consistent, recognisable patterns.
| Bleached or pale patches that dry and turn crispy-black appear on the most sun-exposed surfaces. | Most likely cause |
|---|---|
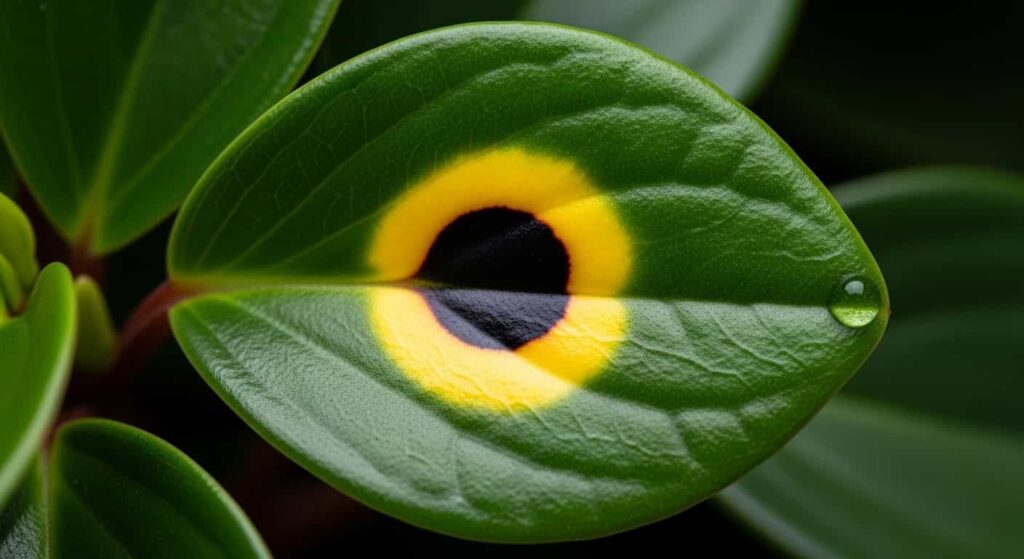
| Overwatering/root rot | Small, circular spots with a distinct yellow halo; may have a slightly raised or sunken surface. |
| Dark margins or tips on older leaves; white crust on the soil surface is possible. | Fungal disease |
| Water-soaked, greasy-looking patches that turn brown-black quickly; irregular edges; no powdery coating | Bacterial leaf spot |
| Sunburn/heat scorch | Sudden dark patches affecting whole leaves or sections uniformly, soft; onset after cold exposure |
| Dark margins or tips on older leaves; white crust on the soil surface is possible. | Cold damage |
| Tiny black dots, stippling, or dark specks; sticky residue or webbing present | Pest damage |
| Dark margins or tips on older leaves; white crust on the soil surface is possible | Nutrient imbalance or fertiliser salt toxicity |
Cause 1: Overwatering and root rot
Overwatering is the single most common cause of black spots on Peperomia obtusifolia. These plants have thick, semi-succulent leaves and stems that store water efficiently, so they require far less frequent watering than most tropical houseplants. When the roots are kept in waterlogged soil for extended periods, the consequences move through the plant quickly.
What happens physiologically
Saturated soil contains little oxygen. Root cells need oxygen to function; deprived of it, they suffocate and die within days. Dead root tissue becomes colonised by water-mould pathogens — most commonly Pythium and Phytophthora species — which rapidly expand into living tissue. The rot spreads upward through the stem, eventually reaching the petioles and leaf bases, where it presents as the characteristic soft, dark patches on leaves.
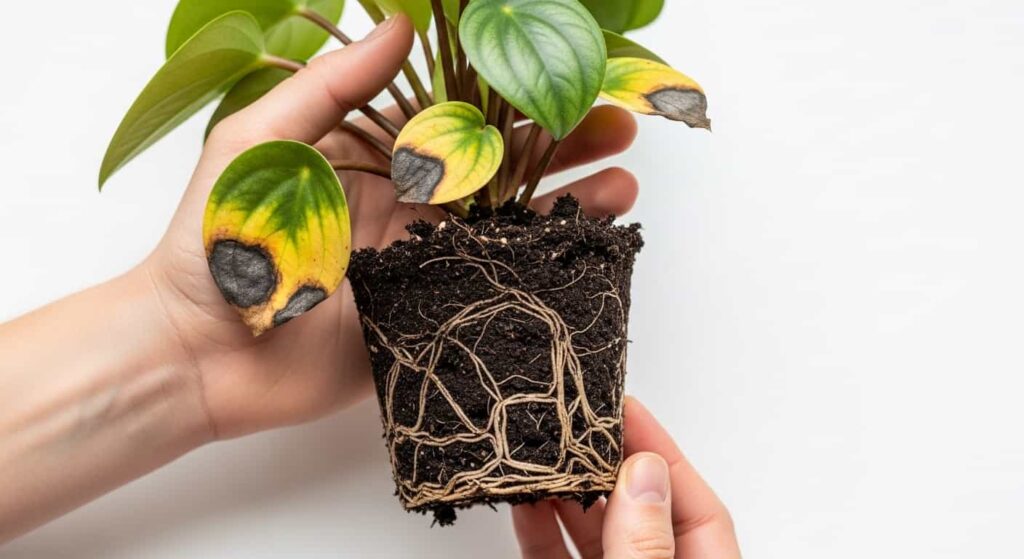
Identifying signs
- Spots are soft and mushy to the touch — pressing the dark area feels like pressing a rotten piece of fruit.
- Yellowing of leaves surrounding the spots, progressing outward
- A sour or musty odour from the soil, particularly when disturbed
- Wilting despite the soil feeling wet
- When the plant is removed from its pot, roots appear brown, black, or slimy rather than white or tan.
Treatment steps
- Stop watering immediately and move the plant to a well-ventilated location.
- Remove the plant from its pot. Gently shake off as much old soil as possible.
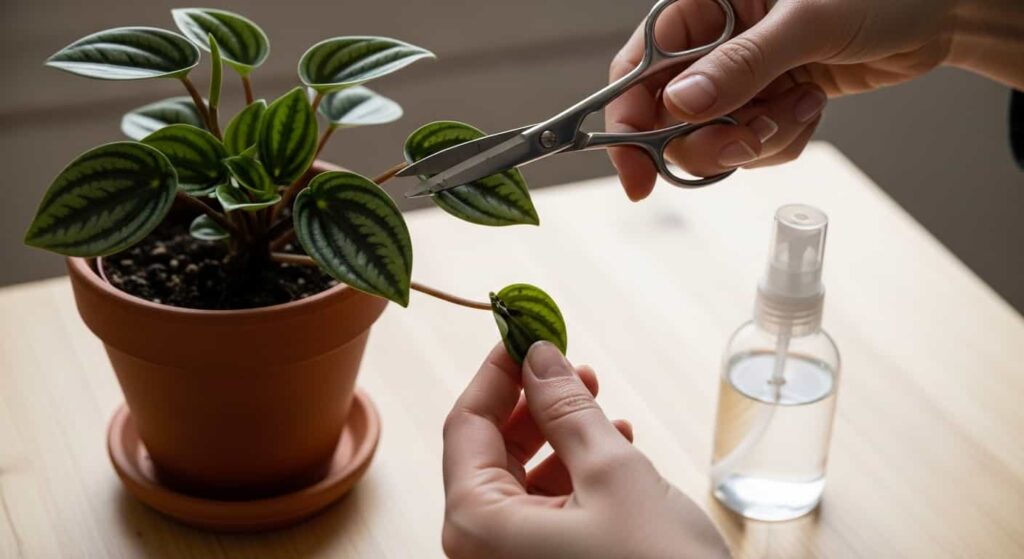
- Inspect every root. Healthy roots are firm and white to light tan. Rotten roots are brown or black, soft, and often disintegrate when handled. Using clean, sharp scissors or pruning shears that have been wiped with rubbing alcohol, cut away all rotten roots at the point where healthy tissue begins.
- Let the root ball air-dry in a shaded spot for 30–60 minutes. This allows any cuts to begin callusing.
- Repot into fresh, dry, well-draining soil. A suitable mix contains roughly equal parts standard potting compost and perlite, or a dedicated cactus and succulent mix. Avoid reusing the old soil.
- Do not water for at least seven days after repotting. This gives root wounds time to seal and reduces the risk of reinfection.
- Remove affected leaves from the plant using the same sterile technique.
When the plant may not recover
If rot has advanced into the main stem — visible as blackened, mushy tissue at or above soil level — the plant is unlikely to survive as a whole. In that situation, check for any healthy stem sections above the damage and take cuttings to propagate a new plant. Even a single healthy stem with one or two leaves can successfully produce a new plant in water or moist perlite.
Cause 2: Fungal disease
Fungal infections are the second most frequent cause of black spots. They are often triggered by a combination of high humidity, poor air circulation, and wet foliage — conditions that regularly arise when plants are watered overhead or kept in stagnant, enclosed spaces.
Common fungal pathogens involved
- Cercospora spp. — Produces small, circular spots with pale or tan centres and dark borders. Spots expand slowly over time.
- Colletotrichum spp. (anthracnose) — Spots begin water-soaked and tan, then darken at the centre and develop irregular edges. Salmon-coloured spore masses may appear in moist conditions.
- Botrytis cinerea (grey mould) — More common in cool, damp conditions; produces greyish fuzzy growth on the surface of dying tissue.
- Rhizoctonia spp. — Typically causes damping-off in seedlings or brown-to-black lesions on stems near soil level.
Identifying signs
- Spots are circular to roughly oval, usually 2–10 mm in diameter when first noticed
- A yellow halo surrounding the dark centre is highly characteristic of fungal infections.
- The surface of spots may appear slightly sunken compared to the surrounding healthy tissue.
- Spots spread outward and may coalesce into larger dead zones if untreated
- Fine white or greyish powdery growth on or around spots indicates Botrytis or powdery mildew variants
Treatment steps
- Isolate the plant immediately. Fungal spores spread easily through water splash and air movement.
- Remove all visibly infected leaves using sterile scissors or pruning shears. Dispose of them in a bin — do not add them to compost.
- Apply a copper-based fungicide to all leaf surfaces, including the undersides, following the product’s label instructions. Neem oil (as a 0.5–1% emulsified solution in water) is an alternative with both preventative and suppressive properties.
- Repeat the treatment every 7–10 days for three to four cycles, even if spots appear to have stopped spreading. Fungal spores can remain viable on plant surfaces between visible outbreaks.
- Improve conditions: increase air circulation by spacing plants further apart or opening windows, reduce ambient humidity if it is consistently above 70%, and avoid watering in the evening when water cannot evaporate quickly.
- Water at the base of the plant only, directing water to the soil rather than the leaves.
Cause 3: Bacterial leaf spot
Bacterial infections produce spots that can look superficially similar to fungal ones, but the two differ in several observable ways and require a subtly different treatment approach.
Common bacterial pathogens involved
- Pseudomonas cichorii and related species — Cause angular, water-soaked lesions that are constrained by leaf veins, giving the spots an irregular, geometric appearance.
- Xanthomonas spp. — Typically produces yellow halos with dark, sunken centres; may cause spots to merge into larger dead zones as the infection advances.
How bacterial spot spreads
Bacteria enter plants through natural openings (stomata, hydathodes) or wounds. They spread rapidly via water — including overhead irrigation, rain splash, and touching an infected plant and then a healthy one without washing hands. Insects that feed on plant tissue can also transmit bacteria between plants. Warm temperatures (above 20°C / 68°F) and high humidity accelerate bacterial multiplication.
Identifying signs
- Spots appear water-soaked and translucent when the leaf is held up to light — an especially reliable diagnostic sign.
- Lesion edges are irregular rather than circular, often bounded by leaf veins.
- Infected areas feel greasy or wet even without external moisture
- No powdery or fuzzy coating on the spots — this distinguishes bacterial from most fungal infections
- Spots may expand and merge into large brown-to-black dead zones within days in warm conditions
- Spots may appear anywhere on the leaf surface, not restricted to margins or tips
Treatment steps
- Isolate the plant immediately.
- Remove all infected leaves with sterile tools. Wipe scissors or shears with rubbing alcohol between each cut to avoid spreading bacteria from one cut to the next.
- Apply a copper-based bactericide — copper compounds are effective against both fungal and bacterial pathogens, making them practical for situations where the precise cause is uncertain. Apply to all leaf surfaces according to label directions.
- Eliminate overhead watering permanently for this plant. Direct all water to the soil level.
- Discard heavily infected plants if more than half the foliage is affected and new spots are still appearing despite treatment — bacterial infections can outpace treatment in severe cases. Propagate from any remaining healthy stems.
Cause 4: Sunburn and leaf scorch
Despite being a plant that benefits from bright conditions, Peperomia obtusifolia does not tolerate prolonged exposure to intense direct sun — particularly the harsh midday and afternoon sun of south- or west-facing windows in summer.
Why does sunburn produce black spots?
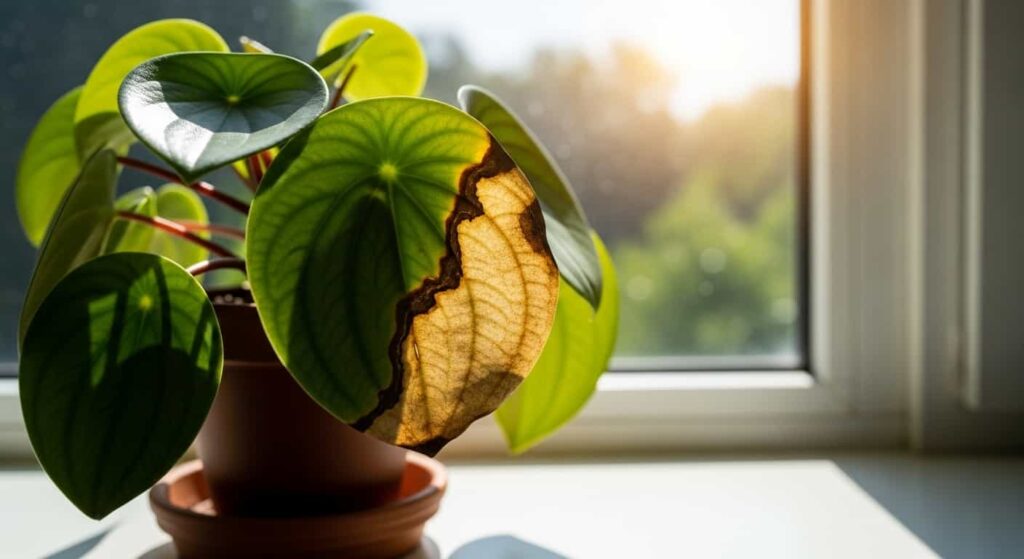
Direct sunlight concentrated through glass dramatically raises the surface temperature of the leaf. Cells in the affected area overheat, the proteins and membranes within them denature, and the tissue dies. This physical damage initially appears as bleached, pale, or yellowish patches; as the dead tissue desiccates, it turns brown to black with a crispy, papery texture.
The damage is a physical injury rather than a biological infection — it does not spread, is not contagious, and cannot be reversed in the affected leaves.
Identifying signs
- Patches are dry, crispy, and papery rather than soft or mushy
- Damage appears on the upper leaf surface and on whichever parts of the leaf faced the light source most directly
- Bleached or pale-coloured patches precede the darker discolouration — if you notice fading first, this is an early warning sign
- Symptoms appear or intensify after the plant has been moved to a sunnier location, or in early summer when sun angles change, and previously adequate spots become too bright
- Multiple leaves on the same side of the plant are affected, matching the direction of the light source
Treatment steps
- Move the plant to a position with bright, indirect light — an east-facing window, or a few feet back from a south- or west-facing window where the plant is not in a direct beam.
- Use a sheer curtain or blind to filter harsh direct sun if the ideal room only has strong south or west windows.
- Remove badly scorched leaves to redirect the plant’s energy toward healthy growth and improve its appearance.
- Existing burned patches will not recover — treatment is entirely about removing the ongoing stressor and preventing new damage on emerging leaves.
- Acclimatise gradually if moving a plant to significantly brighter conditions. Increase light exposure over one to two weeks rather than making an abrupt change.
Cause 5: Cold damage and draughts
Peperomia obtusifolia is a tropical species native to warm, humid forests and is notably sensitive to cold temperatures and sudden temperature fluctuations.
What temperatures cause damage
Cell damage begins when temperatures fall below approximately 10°C (50°F). Exposure need not be prolonged — even a few hours near a single-glazed winter window, an air conditioning vent, or a door opened to cold air can cause visible damage within days.
The physiological mechanism
Cold causes ice crystals to form within plant cells, rupturing the cell membranes. Once membranes are destroyed, the cell contents leak, and the tissue collapses. Cold draught compounds this by simultaneously drawing moisture out of the leaves faster than damaged roots can replace it, causing a form of physiological drought in already-injured tissue.
Identifying signs
- Dark patches appear suddenly, over the course of one to a few days
- Damage affects entire leaves or large sections uniformly, rather than producing the isolated, circular spots typical of fungal disease
- Affected leaves may become limp and collapse entirely
- Symptoms are spatially linked to the cold source — leaves on the side nearest a cold window or vent are worst affected
- The soft, dark texture can look similar to overwatering damage; the key distinction is timing (onset after a cold event) and pattern (geometric, directional damage rather than scattered spots)
Treatment steps
- Move the plant away from the cold source immediately — to a stable, draught-free position at room temperature.
- Remove all cold-damaged leaves. They will not recover and may become entry points for secondary bacterial or fungal infection.
- Maintain temperatures between 18–26°C (65–80°F). Avoid placing the plant near exterior walls, single-glazed windows in winter, air conditioning vents, or doorways subject to frequent opening in cold weather.
- Reduce watering during recovery. Damaged tissue affects the plant’s overall water uptake efficiency; the remaining root system may not handle normal watering volumes.
- Do not fertilise until several weeks of new healthy growth confirm the plant is recovering.
Cause 6: Pest damage
Several common houseplant pests produce black spotting or dark discolouration on Peperomia obtusifolia, either through direct feeding damage or as a secondary consequence of the stress they cause.
Pests most commonly involved
| Pest | Rasp leaf surfaces, leaving silvery streaks; black frass (excrement) deposits are a reliable sign. |
|---|---|
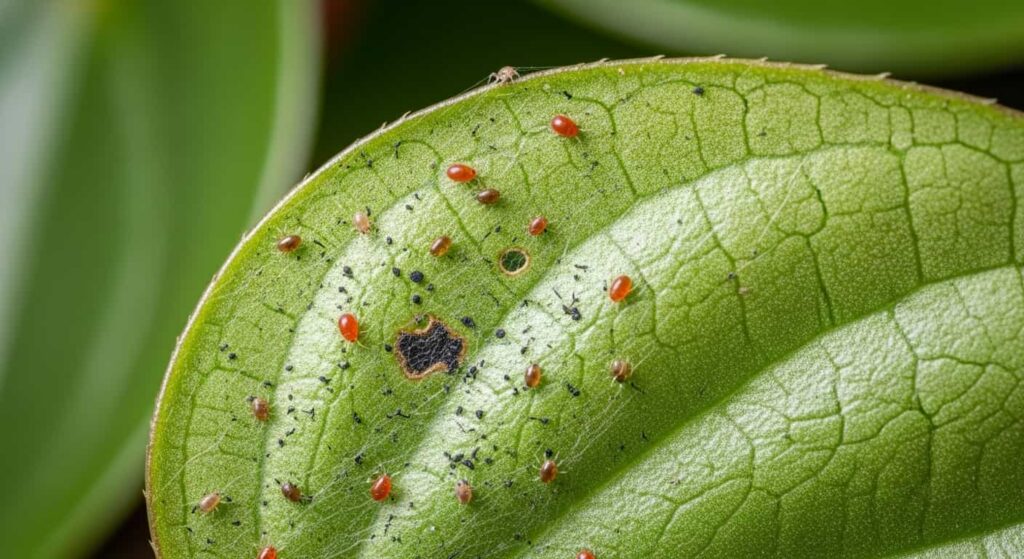
| Spider mites (Tetranychus urticae) | Feed by piercing cells and extracting contents, producing stippled or mottled dark dots; webbing is visible under leaves in heavy infestations. |
| Thrips (Frankliniella spp.) | Adults are harmless; larvae feed on fine roots, creating stress that manifests as leaf discolouration and decline. |
| Scale insects (Coccus, Saissetia spp.) | Brown or black crusty bumps along stems and leaf undersides; indirect spotting from sustained sap extraction |
| Fungus gnats (Bradysia spp.) | Adults are harmless; larvae feed on fine roots, creating stress that manifests as leaf discolouration and decline |
| Mealybugs (Planococcus, Pseudococcus spp.) | Waxy white clusters at leaf joints; indirect spotting from ongoing sap loss and sooty mould growing on their honeydew secretions |
Identifying signs
- Inspect the undersides of all leaves with a magnifying glass or loupe — most insects and their eggs concentrate on leaf undersides.
- Look for webbing (spider mites), white cottony clusters (mealybugs), dark sticky deposits (scale or sooty mould), or black specks (thrips frass)
- Tap a suspect leaf over a white sheet of paper — spider mites will be visible as tiny moving dots.
- Check the soil surface for small flying insects when disturbed (fungus gnats)
- Pest-caused spots are typically associated with other visible signs — you rarely have pest damage without at least some of the above physical evidence being present.
Treatment steps
- Isolate the plant from other houseplants.
- Remove visible insects manually — use a cotton swab dipped in rubbing alcohol to dislodge scale insects and mealybugs directly.
- Wash leaves with water to physically remove mites, eggs, and honeydew before applying any treatment.
- Apply a neem oil solution (0.5–1% neem oil emulsified with a few drops of liquid soap in water) to all leaf surfaces, including undersides. Neem oil disrupts insect hormonal cycles and is effective against a broad range of soft-bodied pests.
- Insecticidal soap solution (potassium-salt-based) is an alternative or complement to neem, particularly effective against mites and soft-bodied insects.
- Repeat treatment every 5–7 days for a minimum of three cycles. Most pest species have egg stages that are not killed by a single treatment; successive applications break the lifecycle.
- For fungus gnats, allow the soil to dry out completely between waterings to eliminate the moist conditions larvae require. Yellow sticky traps placed near the soil surface capture adults.
- For spider mites, slightly increasing humidity around the plant (mites thrive in hot, dry conditions) and ensuring good leaf hygiene provides additional suppression alongside treatment.
Cause 7: Nutrient imbalance
Nutritional problems are the least common cause of black spots on Peperomia obtusifolia and are typically differentiated from infectious or environmental causes by the pattern and location of discolouration on the leaf.
Nutrient deficiency
Peperomia obtusifolia is a light feeder and rarely suffers from deficiency in adequately managed conditions. When deficiencies do occur, they typically follow predictable visual patterns:
- Nitrogen deficiency: Older, lower leaves yellow progressively; in advanced cases, marginal browning or blackening can develop. New growth remains relatively healthy until deficiency is severe.
- Potassium deficiency: Brown-to-black margins and tips, most prominent on older leaves. Edges appear scorched and may curl.
- Magnesium deficiency: Interveinal chlorosis (yellowing between veins while veins remain green) on older leaves; not typically black-spotting but can progress to tissue death.
- Calcium deficiency: Distorted new growth; blackening at growing tips in severe cases.
Fertiliser salt toxicity (over-fertilisation)
This is more commonly encountered than deficiency. Peperomia obtusifolia is frequently over-fertilised relative to its actual nutritional needs. Excess fertiliser salts accumulate in the soil and draw water out of root cells via osmosis, mimicking drought stress even when the soil is moist. Symptoms include:
- Crispy, brown-to-black leaf tips and margins
- White or yellowish crust on the soil surface or around the drainage holes of the pot
- Overall, wilting or lack of turgor despite regular watering
Fluoride and chlorine toxicity from tap water
Peperomia obtusifolia is moderately sensitive to the fluoride added to many municipal water supplies. Fluoride accumulates in leaf tips and margins over time, causing progressive browning and blackening at the edges. Chlorine sensitivity is less of an issue with modern water supplies than it was historically, but it can still be relevant.
Treatment steps
For over-fertilisation / salt toxicity:
- Flush the soil thoroughly by running a large volume of water slowly through the pot — approximately three to four times the pot’s volume — and allow it to drain completely. This leaches accumulated salts.
- Do not fertilise again until the following growing season. Resume with a half-strength, balanced liquid fertiliser applied monthly during spring and summer only.
- Do not fertilise during autumn or winter when the plant is not in active growth.
For suspected deficiency:
- Apply a balanced, diluted liquid fertiliser at half the dose recommended on the label during the growing season (spring through summer).
- Reassess after four to six weeks. If symptoms continue spreading to new growth, consider whether the soil itself may have become depleted and whether repotting into a fresh mix would help.
For fluoride/chlorine sensitivity:
- Switch to rainwater, filtered water, or distilled water. This is particularly worthwhile if you have noticed progressive tip browning that has not responded to other changes.
- Alternatively, fill watering containers with tap water the evening before use — this allows chlorine (but not fluoride) to off-gas overnight.
Universal triage: what to do when you first notice black spots
Regardless of which cause is ultimately responsible, the following sequence applies every time black spots appear.
Step 1: Isolate the plant
Move it immediately away from other houseplants. If the cause turns out to be infectious (fungal, bacterial) or pest-related, isolation prevents spread. If the cause is environmental, isolation has no downside.
Step 2: Diagnose the cause
Use the appearance table at the top of this guide as your first reference. Cross-reference with:
- Current watering frequency and recent history — has the soil been staying wet for longer than a week?
- Recent changes — has the plant moved location, experienced cold exposure, or been repotted?
- Physical inspection of leaves and roots — touch the spots, check the undersides of leaves, assess soil moisture and smell.
Take your time here. Applying the wrong treatment (for example, treating a drought-stressed plant with fungicide) wastes time and may worsen the plant’s condition.
Step 3: Remove damaged tissue
Using sterile, sharp scissors or pruning shears, remove all leaves that are more than approximately 50% affected by spots or show soft, mushy tissue. Lightly spotted leaves may be left if the plant has few leaves overall, but heavily affected ones should go. Sterilise tools with rubbing alcohol before and after use. Dispose of removed leaves in a bin, not in compost.
Step 4: Apply targeted treatment
Follow the relevant section above for the identified cause.
Step 5: Optimise general conditions during recovery
Regardless of the original cause, the following conditions support faster recovery:
- Bright, indirect light — neither full shade nor direct sun
- Reduce watering frequency until the plant is visibly improving
- Good air circulation — avoid closed, stagnant environments
- Stable temperatures between 18–26°C (65–80°F), away from cold draughts and heat sources
Step 6: Monitor for four weeks
Check the plant weekly. If new spots are appearing on previously healthy leaves, the underlying problem has not been fully resolved. Reassess using the diagnosis table and re-examine each possible cause systematically. Conversely, if new leaves are emerging and existing healthy leaves remain spot-free after two to four weeks, recovery is on track.
How to prevent black spots from returning
Watering correctly
The most consequential habit for Peperomia obtusifolia care is watering based on soil condition rather than a fixed schedule. Frequency varies considerably across seasons, pot sizes, soil compositions, and home environments — a schedule that works in summer will almost certainly overwater the plant in winter.
Practical guidance:
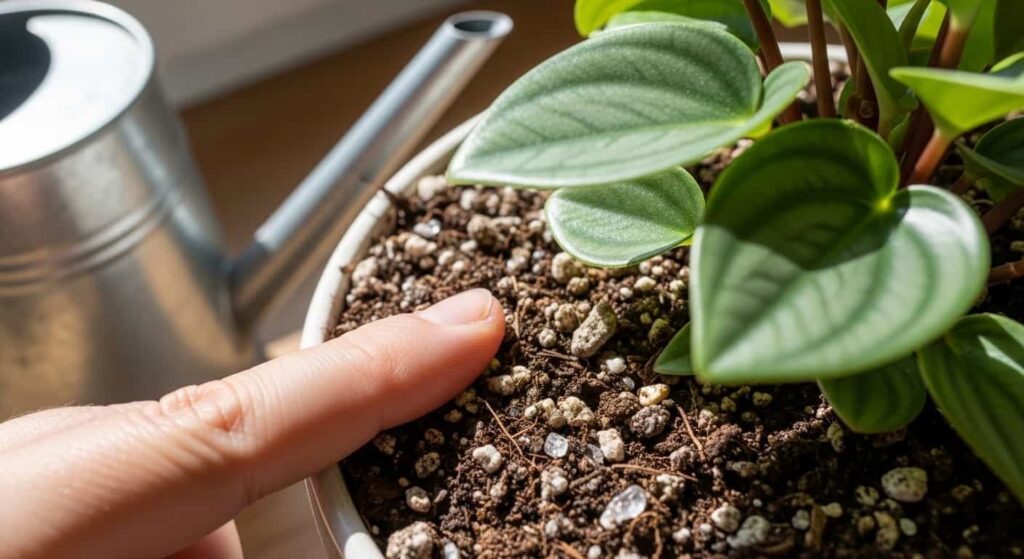
- Check the soil before every watering by inserting a finger 2–3 cm (about 1 inch) into the soil. Water only when the top layer feels dry.
- Pick the pot up before and after watering — a dry pot feels noticeably lighter than a freshly watered one. Over time, this “lift test” becomes instinctive and is more reliable than any schedule.
- Water at the base of the plant is directed at the soil only. Wet foliage is an entry point for fungal and bacterial pathogens.
- Ensure the pot has drainage holes. Peperomia obtusifolia will not thrive long-term in pots without drainage.
- Empty saucers 20–30 minutes after watering to prevent the pot from sitting in standing water.
Soil composition
The soil mix is the structural foundation of successful Peperomia obtusifolia care. Standard potting compost used alone tends to retain too much moisture for too long. A well-draining mix — roughly 50% standard potting compost and 50% perlite, or a cactus/succulent mix amended with additional perlite — dries out at an appropriate rate for this species.
Avoid:
- Dense garden soil or topsoil indoors — it compacts, drains poorly, and introduces pathogens.
- “Moisture control” or “moisture retention” mixes — these are counterproductive for Peperomia obtusifolia
- Peat-heavy mixes without amendments — peat holds considerable water and is slow to re-wet once it dries completely.
Pot choice
Pot material affects how quickly the soil dries between waterings. Terra cotta (unglazed fired clay) is genuinely superior for Peperomia obtusifolia — it is porous and allows water to evaporate through the pot walls, shortening the time the soil remains wet after watering. This meaningfully reduces overwatering risk.
Glazed ceramic, plastic, and glass pots retain moisture longer. They are not incompatible with Peperomia obtusifolia, but they require more careful watering discipline — allowing the soil to dry slightly more than you would with terra cotta before watering again.
Light placement
Position the plant in bright, indirect light — near an east-facing window or set back from a strong south or west window behind a sheer curtain. Avoid:
- Prolonged direct midday or afternoon sun, which causes sunburn
- Deep shade or dim interior rooms, which weaken the plant and reduce its ability to recover from stress
Rotate the pot 90 degrees every one to two weeks so all sides receive even light and the plant maintains a balanced shape.
Air circulation
Stagnant, humid air is the primary environmental driver of fungal and bacterial disease. Plants kept in enclosed spaces with no air movement are significantly more vulnerable. Provide gentle air movement through open windows, a ceiling fan on low, or simply keep plants well-spaced rather than tightly grouped.
Regular inspection
Make leaf inspection part of your watering routine. Checking the undersides of leaves every one to two weeks catches pest infestations and early signs of disease before they become established. The earlier a problem is identified, the easier and faster it is to treat.
Quarantining new plants
Any new houseplant can carry pests or disease. Standard practice is to keep new acquisitions in a separate room from your existing plants for at least two to three weeks and inspect them carefully before integration. This single habit prevents a large proportion of houseplant pest and disease incidents.
Seasonal adjustments
- Spring and summer: Monitor for increased watering needs in heat; watch for sudden sunburn risk as sun intensity increases; inspect more frequently as pests are most active in warm conditions.
- Autumn and winter: Reduce watering frequency significantly as growth slows; move the plant away from cold windows and exterior walls; keep it away from radiators and heating vents, which create dry hot air at close range.
FAQs
Should I remove leaves with black spots from my Peperomia obtusifolia?
Remove any leaf that is more than 50% affected, or any leaf showing soft, mushy, or sunken tissue. For lightly spotted leaves where the spots are dry and stable, you may leave them in place while the plant recovers — the spots will not repair themselves, but the leaf can continue to photosynthesise if most of its surface remains intact. Heavily affected foliage should be removed to reduce stress on the plant and eliminate potential infection sites.
Can a Peperomia obtusifolia recover from black spots?
Yes, in most cases and often fully. Plants caught at an early stage of root rot, fungal infection, or pest infestation typically recover within four to eight weeks once conditions are corrected. Even plants with significant root rot can often be saved if healthy root tissue remains. The exception is severe bacterial infection advancing through the stem, or rot that has reached the growing tip — in those situations, propagating healthy cuttings is often the more reliable path forward.
Why does my Peperomia keep getting black spots after treatment?
Recurring spots after treatment indicate the underlying cause was not fully resolved. The most common explanations are: the soil still retains too much moisture (wrong soil type, no drainage holes, or pot material causing slow drying); watering frequency hasn’t been reduced enough; a pest population wasn’t fully eliminated because not enough treatment cycles were completed; or the plant is still exposed to the environmental stressor (cold, direct sun) that caused the initial damage. Reassess each factor systematically rather than repeating the same treatment.
How often should I water to avoid black spots?
There is no universally correct watering schedule. Water only when the top 2–3 cm of soil is dry to the touch — this typically means every 7–14 days in summer and every 14–21 days in winter in most indoor environments, but varies depending on pot size, soil composition, temperature, humidity, and season. Observation always trumps schedules.
Can I use hydrogen peroxide for root rot?
A dilute hydrogen peroxide solution (3% concentration, further diluted 1:4 with water to produce a roughly 0.75% solution) can be used as a soil drench to kill anaerobic pathogens and fungus gnat larvae. However, it is not a substitute for removing rotten roots and repotting in fresh, well-draining soil — it is at most a supplementary measure used alongside, not instead of, physical intervention.
Are black spots on Peperomia obtusifolia contagious to other plants?
It depends on the cause. Fungal and bacterial infections can spread to neighbouring plants via water splash, air movement, shared tools, or physical contact. Pest infestations spread readily from plant to plant. Overwatering damage, sunburn, and cold injury are not contagious — they are plant-specific responses to environmental conditions. When the cause is uncertain, treat the situation as potentially contagious and isolate until you have confirmed the diagnosis.
Is black spot damage reversible on individual leaves?
No. Once leaf cells have died — from any cause — the darkened tissue does not recover. Individual spots do not heal or fade. What you are aiming for with treatment is to stop new spots from forming on existing leaves and to allow new growth to emerge without damage. If a leaf is otherwise healthy and functional despite bearing small, stable spots, there is no need to remove it immediately — but it will never return to its original appearance.
Bottom line
Black spots on Peperomia obtusifolia are almost always solvable. The cause is identifiable through careful observation of the spots themselves, the plant’s recent history, and its environment. Overwatering and root rot account for the majority of cases; once that is ruled out or treated, the remaining causes each have clear diagnostic signatures and effective responses.
The most durable long-term prevention comes not from treatments or products but from two habits: watering based on soil condition rather than a fixed schedule, and inspecting leaves regularly enough to catch problems early. A plant that is watered correctly and monitored consistently is unlikely to develop serious black spot problems.
This guide is written for general informational purposes. Individual plants, homes, and growing conditions vary — always observe your specific plant and adjust care based on how it responds.