Last Updated on March 24, 2026 by Peperomia obtusifolia
If you’ve ever looked at your lush, glossy Peperomia obtusifolia and thought, “I want more of these,” you’re in the right place. The good news? This plant is one of the most forgiving species to propagate — even for beginners.
In this complete guide, you’ll learn exactly how to propagate Peperomia obtusifolia using three proven methods: stem cuttings, leaf cuttings, and division. We’ll walk you through every step, cover common mistakes, and tell you what tools actually make the process faster and more reliable.
What Is Peperomia Obtusifolia?
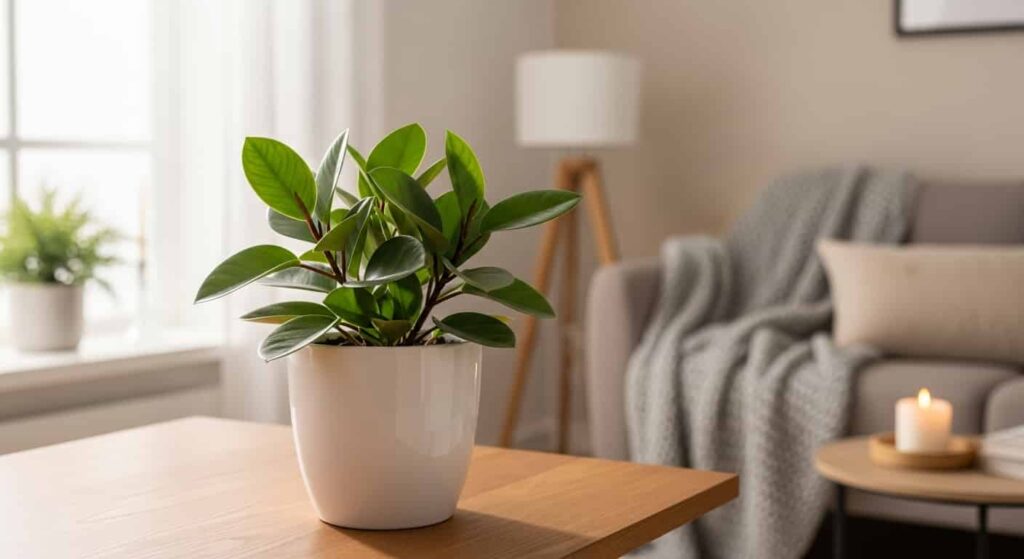
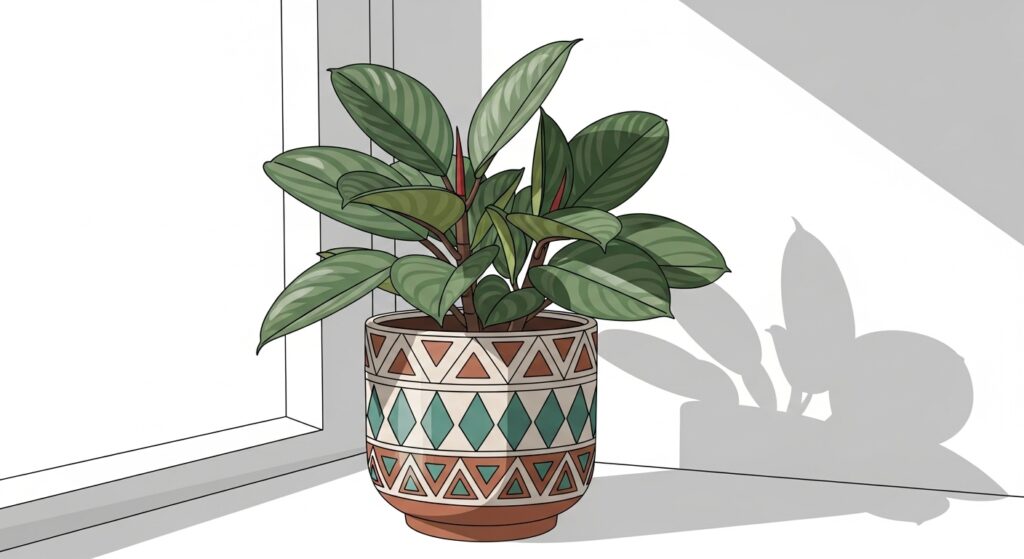
Peperomia obtusifolia — commonly called the Baby Rubber Plant or American Rubber Plant — is a tropical houseplant native to South America and the Caribbean. It features thick, waxy, dark-green leaves on upright stems and thrives in indirect light with minimal watering.
What makes it ideal for propagation:
- Succulent-like stems store water, giving cuttings time to root before drying out
- Fast root development compared to other tropical houseplants
- Resilient to mistakes — it tolerates imperfect humidity, irregular watering, and beginner errors
- Multiple viable propagation methods so you can choose what works for your setup
When Is the Best Time to Propagate Peperomia Obtusifolia?
The optimal window is spring through early summer, when the plant is in active growth. Warmer temperatures and longer daylight hours accelerate root development significantly.
That said, Peperomia obtusifolia can be propagated successfully year-round if you:
- Keep the cutting in a warm spot (65–80°F / 18–27°C)
- Avoid propagating during the plant’s most dormant phase (mid-winter)
- Supplement with a grow light during low-light months
Pro Tip: If you want to propagate in winter, placing your cuttings under a grow light for 12–14 hours per day dramatically improves success rates.
What You’ll Need Before You Start
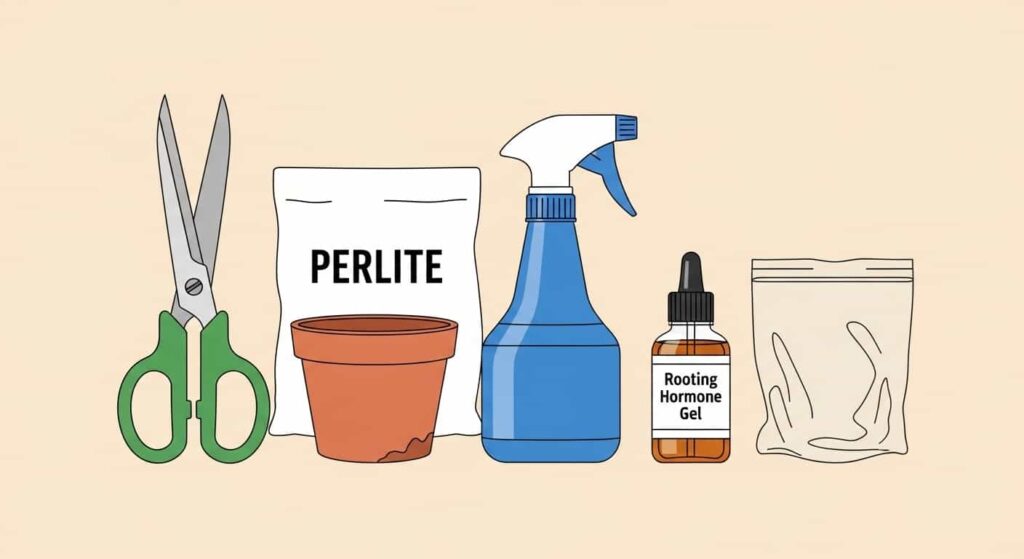
Regardless of which method you choose, gather these supplies first:
| Supply | Purpose |
|---|---|
| Sharp, sterilized scissors or pruning shears | Clean cuts reduce disease risk |
| Small pots or propagation tray | Holds rooting medium |
| Well-draining propagation mix (perlite, coco coir, or seed-starting mix) | Prevents root rot |
| Rooting hormone powder or gel (optional but helpful) | Speeds up root formation |
| Clear plastic bag or humidity dome | Retains moisture around cuttings |
| Spray bottle | Misting without waterlogging |
| Rubbing alcohol or hydrogen peroxide | Sterilizing tools |
🔗 Propagation starter kit — includes tray, humidity dome & rooting hormone
Method 1: Stem Cuttings (Most Reliable)
Stem cuttings are the most popular and consistently successful method for propagating Peperomia obtusifolia. They root quickly and produce full, bushy plants faster than leaf cuttings.
Step 1: Choose a Healthy Stem
Select a stem that is:
- At least 3–4 inches (7–10 cm) long
- Has 2–3 leaves attached
- Free from yellowing, spots, or signs of pests
Avoid leggy, stretched stems — they root less reliably than compact, healthy growth tips.
Step 2: Make a Clean Cut
Using sterilized scissors, cut just below a leaf node (the bump where a leaf attaches to the stem). A clean cut at a slight angle maximizes the surface area exposed to the rooting medium.
Remove any leaves from the bottom 1–1.5 inches of the stem to prevent rotting. Leave at least 2 leaves at the top.
Step 3: Let the Cutting Callus (Optional but Recommended)
Set the cutting aside on a clean surface for 1–2 hours. This allows the cut end to dry slightly, which reduces the risk of rot when planted.
Step 4: Apply Rooting Hormone (Optional)
Dip the cut end into rooting hormone powder or gel and gently tap off the excess. This step is not mandatory, but it can cut rooting time almost in half.
🔗 Best rooting hormone gel for tropical cuttings — highly rated on Amazon
Step 5: Plant the Cutting
Fill a small pot with a moist but not soggy propagation mix. Options include:
- 100% perlite
- 50/50 perlite and coco coir
- A quality seed-starting mix
Make a small hole with a pencil or chopstick, insert the stem about 1–1.5 inches deep, and gently firm the mix around it.
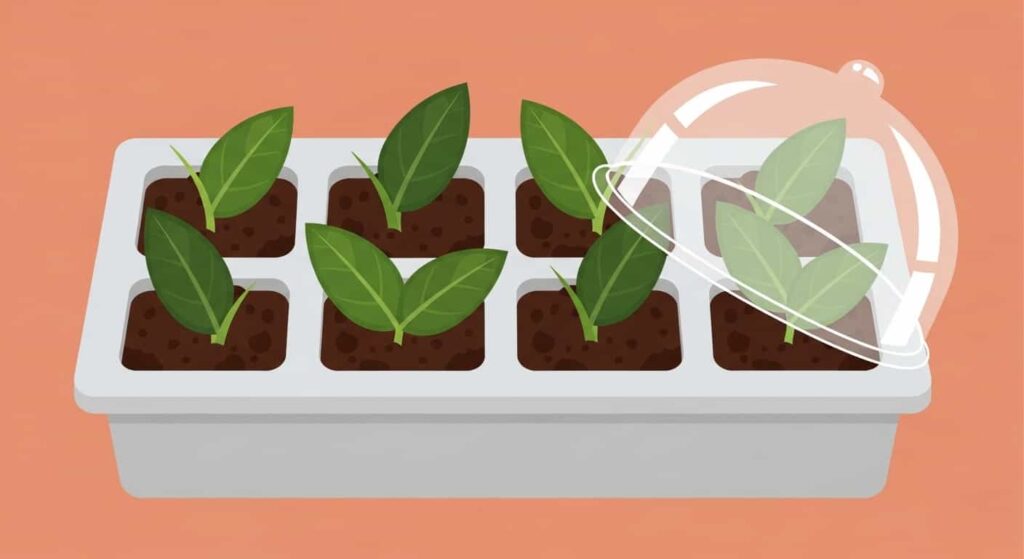
Step 6: Cover and Wait
Cover the pot with a clear humidity dome or plastic bag to trap moisture. Place it in a warm spot with bright, indirect light — never direct sun, which will scorch the delicate cutting.
Expected rooting time: 3–5 weeks
Check for roots by gently tugging the cutting after 3 weeks. If you feel resistance, roots have formed. You can also look for white roots appearing at the drainage holes.
Step 7: Transition to Potting Mix
Once roots are 1–2 inches long, transplant into a standard well-draining potting mix for Peperomia. Gradually reduce humidity over 1–2 weeks by opening the dome a little each day.
🔗 Recommended well-draining potting mix for Peperomia — link to best-seller
Method 2: Leaf Cuttings (Great for Multiplying Stock)
Leaf cuttings are slower than stem cuttings but allow you to produce many plants from a single parent — perfect if you want to propagate in bulk without stressing your original plant.
Step 1: Select a Healthy Leaf
Choose a mature, firm, fully developed leaf with a short section of petiole (the leaf stalk) still attached. Avoid very young or old leaves — both root unreliably.
Step 2: Cut the Leaf with Petiole
Using sterilized scissors, cut the petiole close to the main stem, leaving at least ½ inch of petiole attached to the leaf. The petiole is where roots will emerge, so don’t cut it too short.
Step 3: Allow to Callus
Let the leaf sit on a clean surface for 2–3 hours before planting. This brief drying period reduces rot risk.
Step 4: Insert into Rooting Medium
Dip the petiole end into rooting hormone (optional), then insert it about ¼ to ½ inch deep into moist perlite or coco coir. The leaf blade should sit just above the surface.
You can fit multiple leaf cuttings into one tray to propagate efficiently.
🔗 Propagation tray with humidity dome — ideal for leaf cuttings
Step 5: Maintain Warmth and Humidity
Cover with a humidity dome and place in bright, indirect light at 70–75°F (21–24°C). Bottom heat significantly improves success rates for leaf cuttings.
Pro Tip: A seedling heat mat set to 72–75°F beneath the propagation tray speeds up rooting by keeping the medium consistently warm — especially useful in cooler months.
Step 6: Wait Patiently
Leaf cuttings take longer — expect 4–8 weeks before tiny new plantlets emerge at the base of the petiole. Don’t be discouraged if nothing appears to happen for the first few weeks; root development happens underground first.
Once small leaves appear above the surface, and roots are well established, transplant into a standard Peperomia potting mix.
Method 3: Division (Instant Results)
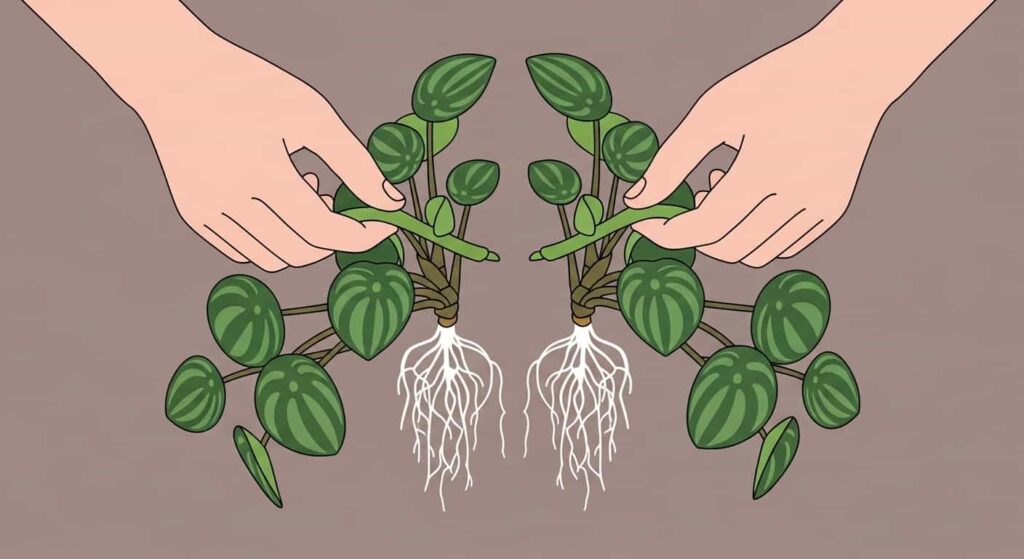
Division is the fastest method — you get a fully established plant immediately, with no waiting for roots. It works best when your Peperomia obtusifolia has grown into a large, multi-stemmed clump.
When to Use Division
Division is ideal when:
- Your plant has outgrown its pot
- You notice multiple separate rosettes or growth clusters
- You want to propagate without any rooting wait time
Step 1: Remove the Plant from Its Pot
Gently tip the plant out of its container and shake off excess soil. Work carefully to avoid snapping roots.
Step 2: Inspect the Root Ball
Look for naturally distinct sections — clusters of stems that have their own root systems. Do not try to force a single-stemmed plant to divide; this method only works on multi-stemmed specimens.
Step 3: Separate the Sections
Use clean, sterilized scissors or your hands to gently tease apart root sections. If the roots are tightly tangled, you can cut through the root ball with a sterile knife — but try to keep as many roots intact as possible on each division.
Each division should have:
- At least 1–2 healthy stems
- A visible portion of the root system
Step 4: Pot Up Each Division
Plant each section into its own pot with fresh, well-draining potting mix. Water lightly and place in bright, indirect light.
Recovery time: 1–2 weeks of slight drooping is normal. The plant redirects energy to establishing roots in the new environment before resuming active growth.
🔗 Best pots for Peperomia — terracotta with drainage (top pick for root health)
Rooting in Water vs. Soil: Which Is Better?

Many plant lovers prefer to root Peperomia obtusifolia stem cuttings in water because you can watch the roots develop, which is satisfying and helps you know exactly when to pot up.
Water Propagation (Stem Cuttings Only)
- Place the stem cutting in a small glass or jar with just enough water to submerge the bottom 1–1.5 inches — keep leaves above the waterline
- Use room-temperature, filtered or distilled water when possible
- Change the water every 5–7 days to prevent bacterial growth
- Place in bright, indirect light
- Roots typically appear in 2–4 weeks
- Once roots reach 1–2 inches, transition to soil gradually (mix water with a little potting mix over several days to avoid transplant shock)
Drawback: Water-rooted cuttings sometimes struggle when moved to soil because their root structure adapts to aquatic conditions. Transitioning slowly minimizes this.
Common Propagation Problems (And How to Fix Them)
Cuttings Are Rotting
Cause: Too much moisture, no callusing, or unsterilized tools.
Fix:
- Always sterilize cutting tools with rubbing alcohol
- Let the cuttings callus for 1–2 hours before planting
- Use a well-draining mix (heavy potting soil retains too much moisture)
- Ensure your pot has drainage holes
No Roots After 6 Weeks
Cause: Too cold, too dark, or cutting taken from stressed parent plant.
Fix:
- Move to a warmer location (minimum 68°F / 20°C)
- Add a grow light if natural light is low
- Use a heat mat to warm the rooting medium
- Try rooting hormone on your next attempt
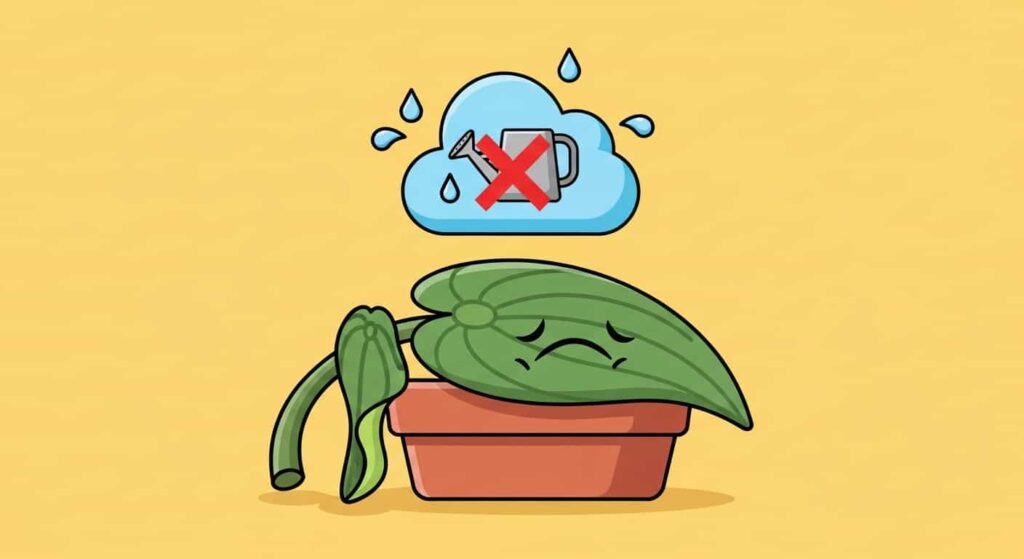
Leaves Drooping or Yellowing
Cause: Normal transplant stress, especially after division or transitioning from water to soil.
Fix: This usually resolves within 1–2 weeks. Avoid overwatering — the most common mistake when trying to “help” a stressed cutting. Let the top inch of the mix dry out between waterings.
Cutting Wilts Immediately After Planting
Cause: The cutting is losing water faster than it can absorb it before roots form.
Fix:
- Use a humidity dome to reduce transpiration
- Move out of direct sunlight
- Mist lightly once a day
Caring for Newly Propagated Peperomia Obtusifolia
Once your new plant is established, Peperomia obtusifolia is low-maintenance. Here’s a quick care summary:
| Care Factor | Allow the top 1–2 inches of soil to dry out before watering |
|---|---|
| Light | Bright, indirect light; tolerates medium light |
| Water | Balanced liquid fertilizer monthly during the growing season |
| Humidity | Average household humidity (40–60%) is fine |
| Temperature | 65–80°F (18–27°C); protect from drafts and frost |
| Fertilizer | Balanced liquid fertilizer monthly during growing season |
| Repotting | Every 2–3 years, or when rootbound |
🔗 Recommended liquid fertilizer for Peperomia (gentle, balanced formula)
Frequently Asked Questions
How long does it take to propagate Peperomia obtusifolia?
Stem cuttings typically root in 3–5 weeks in soil, or 2–4 weeks in water. Leaf cuttings take longer — 4–8 weeks — before plantlets emerge. Division produces an instantly established plant with a recovery period of 1–2 weeks.
Can you propagate Peperomia obtusifolia from a single leaf without a petiole?
No. Unlike some succulents, Peperomia obtusifolia leaf cuttings require a petiole (leaf stalk) to successfully produce new growth. A leaf blade alone will not root reliably.
Do I need rooting hormone to propagate Peperomia obtusifolia?
No, rooting hormone is not required — Peperomia obtusifolia roots fairly easily on its own. However, using rooting hormone can significantly speed up the process, particularly for leaf cuttings or during cooler months.
Why is my Peperomia cutting not rooting?
The most common reasons are: too cold (below 65°F), too little light, overwatering/rot, or using a cutting taken from a stressed or sick parent plant. Review the troubleshooting section above for specific fixes.
Can Peperomia obtusifolia be propagated in perlite only?
Yes — 100% perlite is an excellent rooting medium for Peperomia obtusifolia. It provides excellent drainage and aeration while retaining just enough moisture. It’s one of the most recommended options by experienced propagators.
Is Peperomia obtusifolia toxic to pets?
Peperomia obtusifolia is considered non-toxic to cats and dogs according to the ASPCA, making it a great choice for pet-friendly households.
Final Thoughts
Propagating Peperomia obtusifolia is genuinely one of the most rewarding and beginner-friendly plant projects you can take on. Whether you choose stem cuttings for speed, leaf cuttings for volume, or division for instant results, success is well within reach as long as you follow the steps carefully and avoid the most common pitfalls — especially overwatering.
Start with a stem cutting if you’re a beginner. Get the basics right, watch those roots develop, and before long you’ll have a whole collection of these beautiful, glossy plants — to keep, gift, or trade.
🔗 Complete propagation kit — everything you need in one order