
Peperomia Water Propagation: Step-by-Step Guide
Peperomia water propagation works well for this species — stem cuttings root in water about as readily as they do in substrate — provided the cutting is callused before it touches water and the eventual move to soil is handled as a deliberate transition rather than a single abrupt change. This method needs a healthy stem cutting with at least one node, not a bare leaf; leaf cuttings root far more slowly and are better suited to substrate. The single biggest failure risk is not rot in the water itself, but the "wet-to-dry" transplant step, where water-adapted roots are moved into a substrate watering routine they were never built for.
1. Why This Method Works: Stored Water and Adventitious Roots
Peperomia obtusifolia is semi-succulent, storing water in its thick stems and leaves as a buffer against its native forest floor's dry spells. This same stored-water reserve is what lets a rootless cutting survive for weeks in a jar with no root system at all: the plant draws on its own internal supply while it directs energy toward producing adventitious roots — roots that form from stem tissue rather than an existing root system, emerging specifically at the node.
Roots initiated in water are not identical to roots grown in soil. Without soil particles to navigate, they develop thinner and less branched, adapted to absorbing dissolved oxygen directly from the surrounding water rather than drawing it from air pockets between substrate particles. This is a genuine structural difference, not a cosmetic one, and it is the reason the transition described in Section 6 needs to be gradual rather than immediate — a root system built for one oxygen-delivery mechanism does not instantly function under the other.
2. When Water Propagation Is the Right Method
Water propagation suits a stem cutting with at least one node and, ideally, two to three leaves — the same plant material recommended for substrate propagation in the main propagation guide. It is a reasonable default for most growers because it lets you confirm root development visually before committing the cutting to soil, which is useful for a first attempt or for tracking whether a specific cutting is viable at all.
It is not the best choice in every situation. A leaf cutting with petiole roots more slowly regardless of medium, and the extended time submerged in water raises its rot risk further than starting it directly in a perlite-and-bark mix. Variegated cultivars are also more rot-prone in general, so a grower who has struggled with cutting losses before may get a more consistent result starting variegated material directly in substrate rather than water. Spring and summer, when the plant is actively growing, produce faster and more reliable rooting than a cutting taken during the low-light, slow-metabolism months of late autumn and winter.
3. Tools, Medium, and Cutting Selection
- A clean, sharp blade — a bypass pruning shear or a sterile craft knife, wiped with 70% isopropyl alcohol before the cut. A crushed or torn cut from pinching with fingernails heals more slowly and is more prone to infection than a clean one.
- A clear glass container — a jar or a dedicated propagation vessel. Clear glass lets you track root development directly, which is the main practical advantage of this method over substrate rooting.
- Filtered, distilled, or rested tap water. Chlorine and fluoride in some tap water supplies can slow the fine cell division involved in root initiation; leaving tap water out uncovered for 24 hours allows some chlorine to off-gas if filtered water is not available.
- The cutting itself: a stem section with at least one node and two to three leaves, taken from a healthy, actively growing stem — not one already showing yellowing, soft tissue, or pest damage.
A dark or opaque jar is not required, but some growers wrap the glass in foil or use amber glass, reasoning that roots naturally grow away from light and that a darker vessel more closely mimics the below-ground environment they would otherwise develop in. There is no evidence this materially changes rooting speed or success for this species, and the practical advantage of a clear jar — being able to see rot, cloudiness, or stalled progress early — generally outweighs the theoretical benefit of darkness for a home propagation setup.
4. Step-by-Step Method
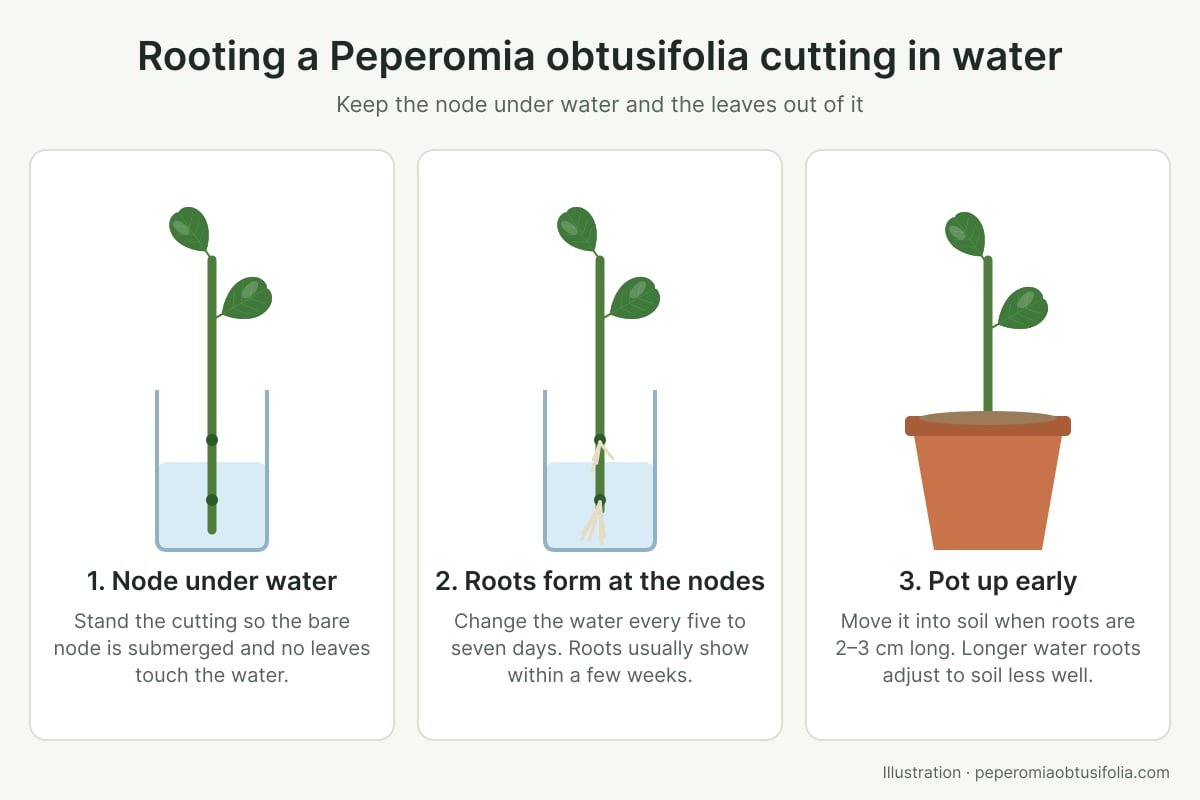
- Take the cutting just below a node, using the sterile blade. Remove any leaves that would otherwise sit below the eventual waterline — submerged foliage decays, and decaying leaf tissue in standing water is a direct rot risk to the node you are trying to root.
- Let the cut end callus on a dry surface out of direct sun before it touches water. This is not optional: the callus is the plant's own seal over the wound, and skipping it gives bacteria a much easier route into the stem's vascular tissue. See the callus timing guide for how long this takes by stem thickness.
- Submerge only the bottom of the stem, including the node, while keeping all remaining leaves above the waterline.
- Place the jar in bright, indirect light, not direct sun, which can overheat a small volume of water and stress the developing root tissue.
- Change the water every 3–5 days, or immediately if it turns cloudy — cloudiness signals bacterial growth and falling dissolved oxygen, both of which raise rot risk at the node.
- Wipe away any slime on the submerged stem when you change the water. This biofilm can restrict gas exchange at the exact point new roots are trying to emerge.
5. Rooting and New-Growth Signs
Stem cuttings usually show roots within a few weeks in warm conditions, and reach plantlet stage — enough root mass to pot up — a few weeks after that. Treat this as a rough expectation, not a guarantee for every cutting: a specimen taken in winter, from a stressed parent plant, or kept in a consistently cool room can take meaningfully longer. A cutting still showing no root activity well past six weeks, with the cut end soft or discoloured rather than firm, has more likely failed than simply been slow, and is a candidate for a fresh attempt rather than continued waiting.
The first visible sign is usually a small, pale swelling directly at the node, before any root is long enough to see clearly — this swelling is the point new root initials are emerging from, and is a more reliable early confirmation than looking for a visible root thread, which can take another week or more to appear after the swelling itself is already established. Once true roots appear, they typically emerge in a small cluster from the same node rather than one at a time, and continue thickening and branching for as long as the cutting remains in water.
6. The Transition to Soil: Where Most Failures Actually Happen
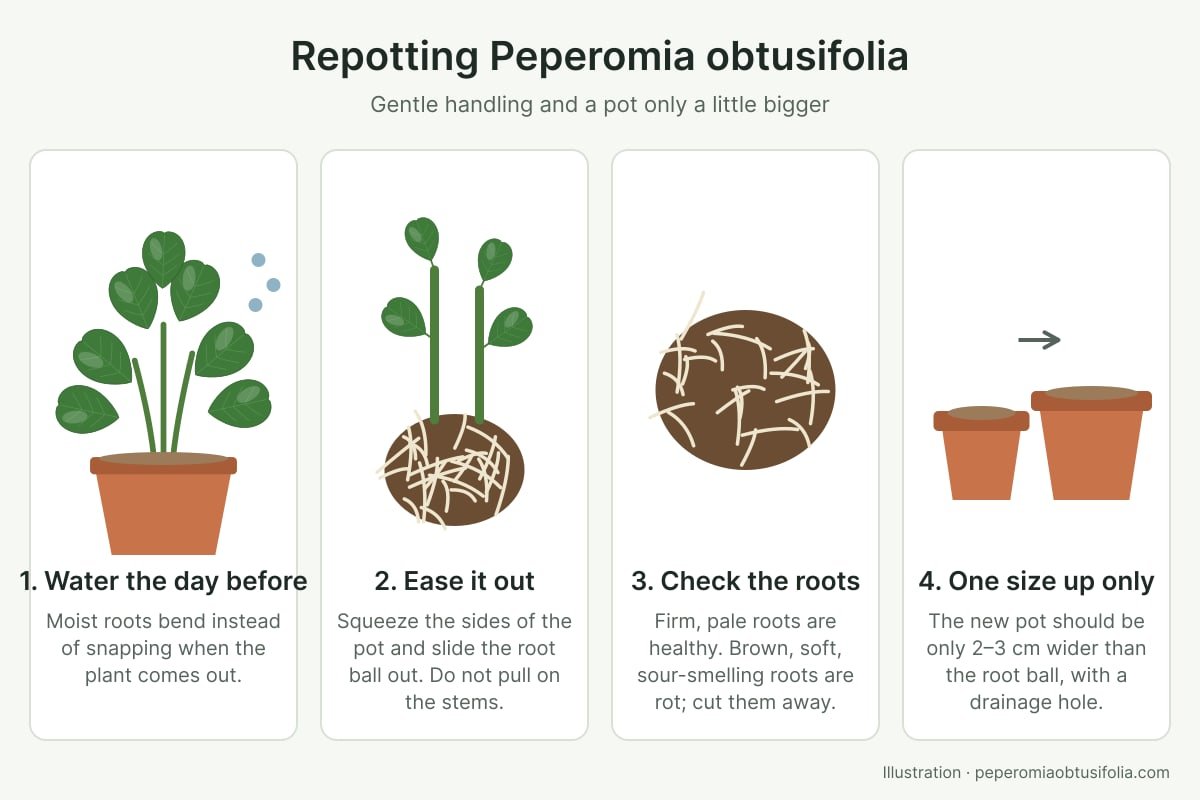
Roots grown in water are not the same tissue as roots grown in substrate. They develop thinner and less branched, adapted to a constant supply of moisture and dissolved oxygen rather than the dry-down cycle a potted plant depends on — moving them straight into a normal soil watering routine is a mismatch that frequently kills an otherwise successfully rooted cutting. The fix is a deliberate transition rather than a single abrupt change:
- Pot up once roots reach roughly 2–5 cm, rather than waiting for a much longer root system to develop in water — very long water roots adapt further to aquatic conditions and transition less well, not more.
- Use a free-draining propagation mix (roughly equal parts perlite and fine bark works well) rather than a moisture-retentive one, even though the plan is to keep it wetter than usual at first.
- Keep the mix noticeably moister than normal for the first 7–10 days, rather than switching immediately to the standard dry-down watering trigger — this gives the water-adapted roots a gradual adjustment rather than an abrupt one.
- Cover the newly potted cutting with a clear plastic bag or propagation dome for about a week, raising local humidity to reduce transpiration stress while the root system reorients to substrate conditions.
- Withhold fertiliser until new growth confirms the transition has succeeded. A root system still adjusting to substrate has little capacity to process added nutrients, and the salts simply accumulate. Full feeding guidance once the plant is established lives in the fertiliser guide.
7. Failure Diagnosis
| Symptom | Likely cause | Correction |
|---|---|---|
| Cut end turns soft, brown, or mushy in water | Insufficient callus time before submersion, or water not changed often enough | Discard and retake the cutting, respecting full callus time; change water more frequently on the next attempt |
| Water turns cloudy quickly and repeatedly | Decaying leaf tissue below the waterline, or infrequent water changes | Remove any submerged leaves; increase change frequency |
| No roots after 6+ weeks, cutting still firm | Slow season (autumn/winter), low light, or a cool room | Continue monitoring; consider moving the jar to a warmer, brighter spot rather than abandoning a still-firm cutting |
| Roots present but plant wilts rapidly after potting up | Abrupt wet-to-dry transition without a humidity dome or gradual dry-down | Increase humidity around the newly potted plant and keep the mix moister for the first week, per Section 5 |
| New leaves emerge pale or smaller than expected in the following months | Water roots poorly adapted to nutrient uptake, now correcting in substrate | Normal during the adjustment period; hold off on fertiliser until growth stabilises rather than feeding to compensate |
Conclusion
Peperomia water propagation is a reliable method for stem cuttings, not a lesser alternative to rooting in substrate — the callus phase before submersion and the deliberate wet-to-dry transition afterward are what actually determine success, not the choice of water over soil in the rooting phase itself. For the other three propagation methods and how to choose between them, see the main propagation guide; for dividing an established multi-stem plant instead of taking cuttings, see the division guide; and if a cutting is already showing rot rather than healthy callusing, see the cuttings rotting rescue guide.
Care FAQ
How long does Peperomia obtusifolia take to root in water?
As a rough expectation, first roots often appear within a few weeks in warm conditions, and the cutting is usually ready to pot up a few weeks after that. These are rough guides, not guarantees — a cutting sitting well past six weeks with no root activity has more likely failed than simply been slow.
Do I need to let the cutting callus before putting it in water?
Yes. A fresh cut is an open wound with no protective layer, and placing it directly into standing water gives waterborne bacteria and fungi a direct route into the stem's vascular tissue. Letting the cut end dry and seal for several hours to a day first substantially reduces this risk — see the callus timing guide for exact timing by cutting thickness.
How often should I change the propagation water?
Every 3–5 days, or immediately if it turns cloudy. Standing water loses dissolved oxygen and accumulates bacterial growth over time, both of which increase rot risk at the submerged node — fresh water resets both problems.
Why do my water-rooted cuttings die after I move them to soil?
Roots grown in water are structurally different from soil roots — thinner, less branched, and adapted to constant moisture and dissolved oxygen rather than an air-and-moisture gradient. Moving them straight into a normal dry-down watering routine is a common failure point; the fix is a gradual transition, covered in the aftercare section below.
Is water propagation better than rooting directly in soil?
Neither is universally better. Water propagation lets you watch root development directly and suits growers who want visual confirmation before committing to soil, at the cost of an extra transition step. Rooting directly in substrate skips that transition but hides progress until you tug gently on the cutting. See the main propagation guide for the full comparison across all four methods.