How to Prune Peperomia for Bushier Growth
To prune Peperomia obtusifolia for bushier growth, cut the stem roughly 0.5 cm above a node using a sterilised blade, removing no more than about one-third of the plant's foliage in one session. The trigger for pruning is a leggy stem with wide gaps between leaves, a one-sided or thin-looking plant, or damaged tissue that needs removing — not a fixed schedule. The one exception that changes the advice: skip heavy pruning on a plant that is already stressed (recently repotted, pest-affected, or in winter dormancy) until it has stabilised.
| Situation | Action | Note |
|---|---|---|
| Bare stem gaps, leggy growth | Prune to force branching | Also fix the light source — pruning alone does not stop recurrence |
| Healthy but thin/sparse plant | Optional tip-pruning once a year | Increases density; not required for plant health |
| Recently repotted or stressed plant | Delay pruning | Wait until new growth resumes before cutting |
| Active fungal or bacterial infection | Remove affected tissue only | Sterilise blade between every cut to avoid spreading it |
| Winter, near-zero growth | Avoid heavy pruning | Recovery is slow to non-existent until spring |
1. The Mechanism: Apical Dominance and Why the Cut Works
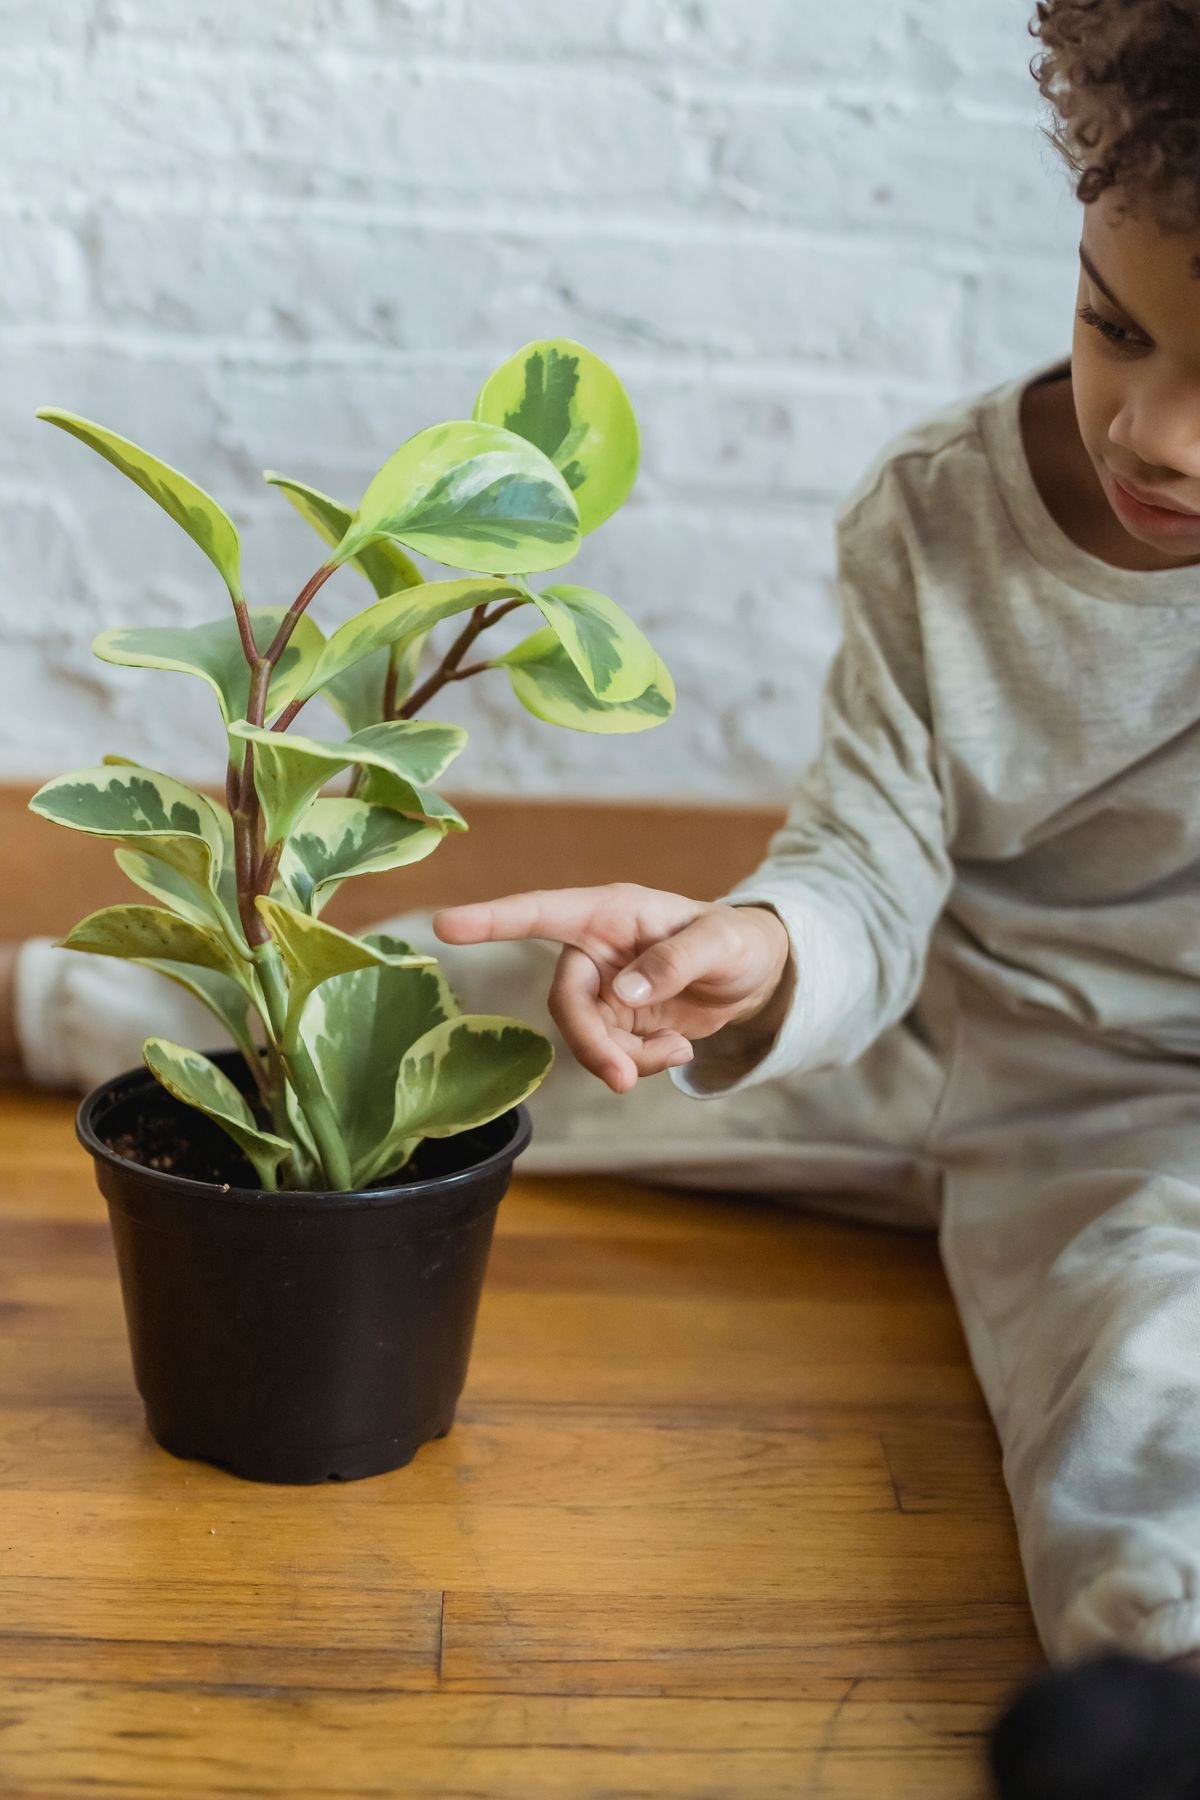
Peperomia obtusifolia, left uncut, tends to grow as one or a few long stems rather than a dense mound, because of a hormonal control system called apical dominance. The actively growing tip of each stem produces auxin, a plant hormone that moves downward through the stem and suppresses the lateral buds at the nodes below it — the plant channels its energy into extending the main stem rather than branching outward. This is well-documented general plant physiology, not a Peperomia-specific quirk (see Beveridge, Rameau & Wijerathna-Yapa, 2023, Journal of Experimental Botany, a century-spanning review of apical dominance research).
Cutting off the growing tip removes the source of that auxin. Within roughly two to three weeks during active growth, one or more of the previously suppressed lateral buds below the cut break dormancy and begin extending as new stems. This is the entire mechanism behind pruning for bushiness: it is not a stimulant applied to the plant, but the removal of an inhibitor that was already suppressing branches the plant was capable of producing. In its native forest-floor and bark habitat, the same effect follows storm damage or browsing — the plant routes stored energy in its succulent stems into multiple new growth points rather than a single replacement shoot, which is the underlying reason it recovers from cutting readily rather than stalling.
2. Quick Decision Checklist: When to Prune
- Needed: stem sections with gaps of 5 cm or more between leaves (etiolated growth), a plant that leans or flops from unsupported stem length, or a stem with disease or physical damage that needs removing.
- Optional: a healthy, adequately lit plant that is simply thinner than preferred. Tip-pruning once a year increases density but is not corrective.
- Harmful, or at least counter-productive: pruning more than a third of the plant at once; pruning a plant that is already stressed from repotting, root rot, or pest damage; heavy pruning in winter when recovery is near-zero.
3. What to Check and Prepare First
- Confirm the actual cause of legginess before cutting, if that is the trigger. Etiolation below roughly 800–1,000 lux sustained for four to six weeks is a light problem; pruning corrects the existing shape but does not prevent it recurring without also improving light — see the light requirements guide.
- Use a sharp, sterile blade — a bypass pruning shear or a clean craft knife. Pinching stems between fingernails crushes the succulent-like tissue rather than cutting it cleanly, leaving a bruised wound that is slower to seal and more prone to fungal entry (see the general troubleshooting guide for what an infected cut looks like).
- Wipe the blade with 70% isopropyl alcohol before starting and between cuts, particularly if any stem shows disease symptoms such as black spots. This is standard practice per general pruning guidance from NC State Extension and Clemson HGIC, and it prevents moving pathogens from one cut to the next.
- Locate the nodes. A node is the point on the stem where a leaf is, or was, attached, and it is where dormant lateral buds sit. Cuts are always made relative to a node, never at an arbitrary point along bare stem.
- Check the season. Prune during active growth (spring–summer) for the fastest recovery; treat winter pruning as maintenance-only (removing damaged tissue), not a bushiness strategy.
4. Step-by-Step: How to Prune Peperomia for Bushier Growth
- Identify the stem to cut. For general density, choose stems that are longest or most bare; for correcting a one-sided plant, target the fuller side lightly and the sparse side more heavily so new growth redistributes toward the gap.
- Count back three to four leaves from the tip along the stem you are cutting, and locate the node at that point.
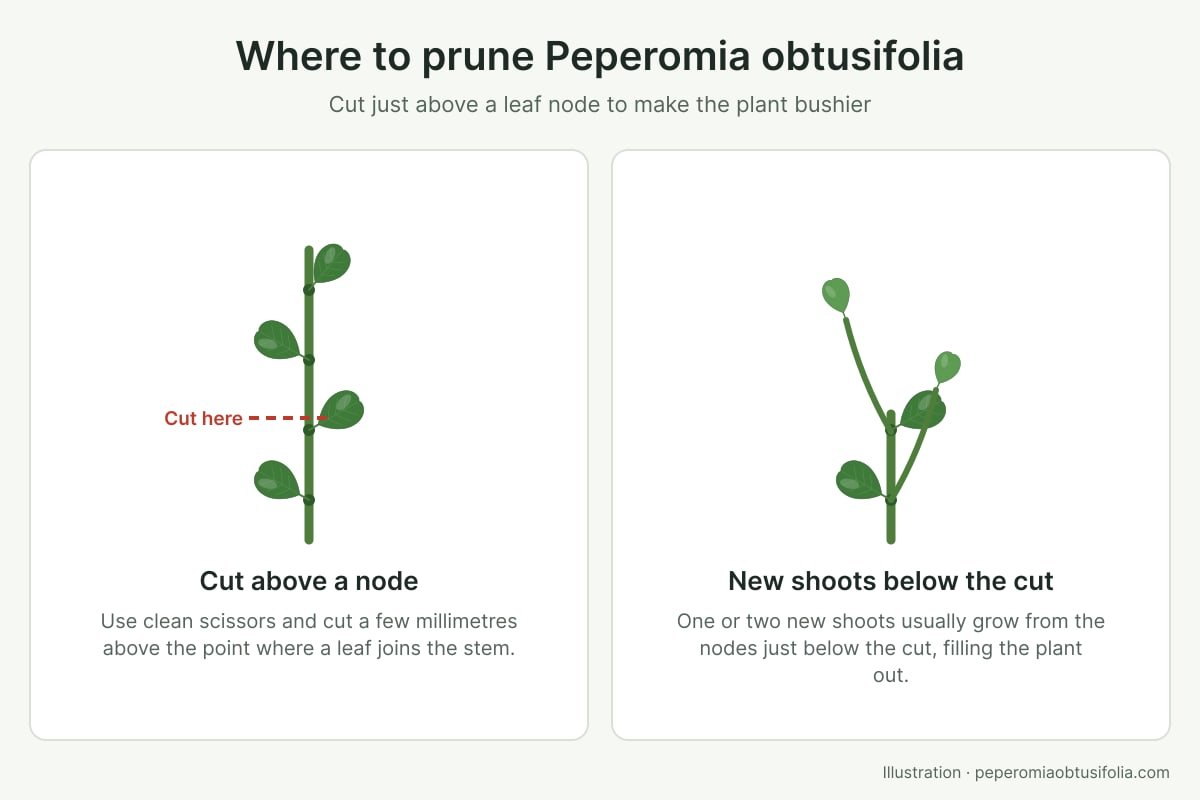
- Cut roughly 0.5 cm above the node, at a slight angle, with a single clean motion. Leaving a longer stub above the node gives the plant dead tissue with nothing to seal, which frequently rots back toward the node; cutting flush against or into the node risks damaging the bud that is meant to break dormancy.
- Remove flower spikes at the base, if present, by the same method — this is optional and does not affect foliage health either way.
- Track the total removed against the one-third limit as you go, particularly if pruning several stems in the same session — it is easy to underestimate cumulative removal stem by stem.
- Sterilise the blade between cuts if you are also removing any diseased tissue, to avoid carrying an infection from a damaged stem to a healthy one.
5. Adjustments for Season, Plant Size, and Cultivar
Season. Spring and summer growth rates of roughly 2–5 cm per stem support the fastest recovery from pruning; growth slows to near-zero from November to February in most temperate homes, so a hard prune in that window can leave visibly bare stems for months rather than the usual two to three weeks.
Plant size and vigour. A younger, actively growing, well-lit specimen tolerates pruning at the upper end of the one-third guidance; an older, root-bound, or already sparse plant recovers more slowly and is better served by a lighter, more conservative cut, closer to 10–15% of total foliage, in line with the general extension guidance that pruning tolerance scales with a plant's current vigour rather than a single fixed percentage for every specimen.
Variegated cultivars. Forms such as 'Variegata' carry 30–40% less functional chlorophyll than the green form and need a correspondingly higher light level to recover compact, non-etiolated growth after a cut. Pruning a variegated specimen without also confirming it sits at the higher end of its light requirement risks replacing one leggy stem with another.
Pot-bound or recently repotted plants. A plant recovering from transplant shock, or one that is severely root-bound, has less stored energy available to fund new branch growth. Delay non-essential pruning until normal growth resumes; see the repotting guide for recovery timelines. Specimens grown in LECA follow the same one-third guidance, though the more consistent nutrient and moisture delivery of a LECA setup tends to shorten the visible recovery window compared with soil.
6. Warning Signs and Troubleshooting
| Symptom after pruning | Likely cause | Correction |
|---|---|---|
| Stub above the node turns brown/soft and dieback progresses toward the node | Stub left too long, or blade crushed rather than cut the tissue | Re-cut cleanly closer to the node, above the rotting section |
| No new growth after 4+ weeks in active season | Pruned during low light, or plant already stressed | Improve light to the 2,000–4,000 lux optimum before expecting a response |
| No new growth in winter | Normal seasonal dormancy, not a pruning failure | Wait for spring; do not re-cut the same stem repeatedly |
| Whole plant wilts or drops leaves after a heavy prune | Removed well over one-third of foliage at once | Reduce watering frequency to match reduced leaf area; avoid further cutting until recovery |
| Cut site shows soft, water-soaked spread rather than a clean scar | Bacterial or fungal infection entering the wound | Sterilise blade, remove affected tissue back to healthy stem, improve airflow |
7. Aftercare and Monitoring
A pruned plant has less leaf area, and leaves are what drive transpiration and photosynthesis, so two care adjustments follow directly from that reduced leaf mass. Water less frequently than before pruning, since a plant transpiring through fewer leaves draws down substrate moisture more slowly — check the top 2–3 cm for dryness rather than watering on the previous schedule (see the watering guide). Hold off on fertiliser until the first new growth nub is visible at a cut node, then resume at half-strength — feeding a plant that is not yet actively growing new tissue risks salt accumulation without a growth response to use it. Keep the plant at its brightest tolerated indirect light during recovery, since new branch growth is funded by photosynthesis in the leaves that remain.

8. Common Mistakes
- Removing more than a third of the plant in one session because several small cuts did not feel like much individually. Track cumulative removal, not just each cut in isolation.
- Leaving a long stub above the node instead of cutting close to it, which invites dieback that can travel back toward the healthy stem.
- Pruning to fix legginess without addressing the light level that caused it, which produces the same bare-stem problem again within a few months.
- Heavy pruning in winter and expecting the two-to-three-week recovery window that only applies during active growth.
- Pinching stems with fingernails instead of using a sterile blade, which crushes rather than cuts the tissue.
Conclusion
Pruning Peperomia obtusifolia works because removing the stem tip removes the auxin suppressing the buds below it, not because the plant needs cutting on any fixed interval. Cut roughly 0.5 cm above a node with a sterile blade, keep total removal under about one-third per session — more conservatively for stressed, root-bound, or dormant-season plants — and expect visible new growth within two to three weeks during spring and summer. A well-branched, compact result from this method is also what underpins the plant's rounded, "coin-leaf" display value referenced in the feng shui placement guide — a leggy, single-stem plant satisfies neither reading. For the plant's full care requirements beyond pruning, see the complete care guide.
Care FAQ
Will pruning harm my Peperomia obtusifolia?
Not if the one-third limit is respected. Removing more than roughly a third of the plant's foliage in one session removes more photosynthetic tissue than the plant can recover from quickly, per general pruning guidance from NC State Extension and Clemson HGIC. Within that limit, cutting stimulates new branching rather than damaging the plant.
How much can I safely remove in one pruning session?
No more than about one-third of the plant's total leaf mass at once. A younger, actively growing specimen in full light tolerates the upper end of that range; a recently repotted, stressed, or low-light specimen should be pruned more conservatively, closer to 10–15%.
Where exactly should I make the cut?
Roughly 0.5 cm (about a quarter inch) above a node — the point where a leaf attaches or attached — at a slight angle. A stub left above the node has no living tissue to seal the wound and is more likely to die back and invite rot; cutting too close to the node can damage the bud itself.
What should I do with the stems I cut off?
They root readily. Peperomia obtusifolia stem cuttings show first roots in 14–28 days in water and reach plantlet stage in 4–6 weeks; see the stem cutting propagation guide for the full method.
Should I remove the flower spikes?
It is optional, not required. The species produces a slender, cream-white spadix-like flower spike 5–13 cm long that is not particularly ornamental. Removing it at the base redirects some energy to foliage, but leaving it does not harm the plant.
How long until I see new growth after pruning?
During the active spring–summer growing period, new growth typically emerges from the node below the cut within 14 to 21 days, consistent with growth-rate patterns documented for this species. In autumn or winter, when growth slows toward near-zero, expect this to take considerably longer or stall until spring.
When is the wrong time to prune?
Avoid heavy pruning in winter, when the plant's growth rate drops close to zero and recovery is slow, and avoid pruning a specimen that is already stressed from recent repotting, pest damage, or root rot — treat the underlying problem first, then prune once the plant is stable.