
Peperomia obtusifolia in LECA: The Canonical Semi-Hydroponics Guide
LECA (lightweight expanded clay aggregate) is fired clay fired at approximately 1,200 °C to expand into porous pebbles 10–25 mm in diameter. Used as the root-zone substrate for Peperomia obtusifolia, it delivers water upward through capillary rise within the internal micro-pores of each pebble while maintaining large air gaps (macro-pores) between pebbles for the gas exchange that this facultative-epiphyte species requires. Reservoir water sits in the lower 1/3 of the cachepot; the upper 2/3 is dry and aerated. Because the medium is chemically inert, the grower must supply complete hydroponic nutrient solution at 50% strength, maintain reservoir pH at 5.5–6.5, and flush accumulated mineral salts every 4 weeks. The medium is reusable (boil 10 minutes to sterilise) and is structurally immune to fungus-gnat infestation. It is not a "set and forget" system — the inert substrate makes water chemistry the entire growing variable.
The shift from soil to LECA is not a cosmetic change. It is a substitution of an engineered porous medium for a biological one, with the consequence that every chemical and hydraulic parameter the soil microbiota used to buffer must now be supplied by the grower. This guide is the canonical reference for the substrate, the reservoir, and the propagation protocol. For the separate question of how to physically move a soil-grown specimen into LECA — including the root-scrub procedure, water-root development, and transition-shock management — see the soil→LECA transition protocol.
| Parameter | Optimum | Risk Threshold |
|---|---|---|
| Reservoir pH | 5.5–6.5 | >7.0 → iron/phosphorus lockout |
| Nutrient strength | 50% of label rate | >75% → osmotic stress |
| Reservoir depth | Lower 1/3 of pot | Crown contact → stem rot |
| Flush interval | Every 4 weeks | >8 weeks → salt accumulation |
| Dry-down before refill | Until near-empty | Continuous topping → anaerobic zone |
| Pebble size | 10–25 mm (LECA) / 2–10 mm (Pon) | <2 mm → reduced aeration |
1. Why It Works: Capillary Rise Plus Macro-Pore Aeration
LECA functions through the simultaneous operation of two scales of porosity. The relevant physics comes from the Wikipedia expanded clay aggregate article, which documents the kiln-firing process that produces the structure.
Internal micro-pores (capillary rise). Each pebble contains thousands of sealed gas bubbles created when the clay expands at high temperature. The surfaces of these bubbles wet readily and the narrow internal channels lift water upward against gravity through adhesion, cohesion, and surface tension — the same mechanism described for bottom-watering soil. Wicking height through LECA reaches 5–8 cm vertically, which is why standard cachepots are sized to keep the reservoir within 7–10 cm of the pebble surface.
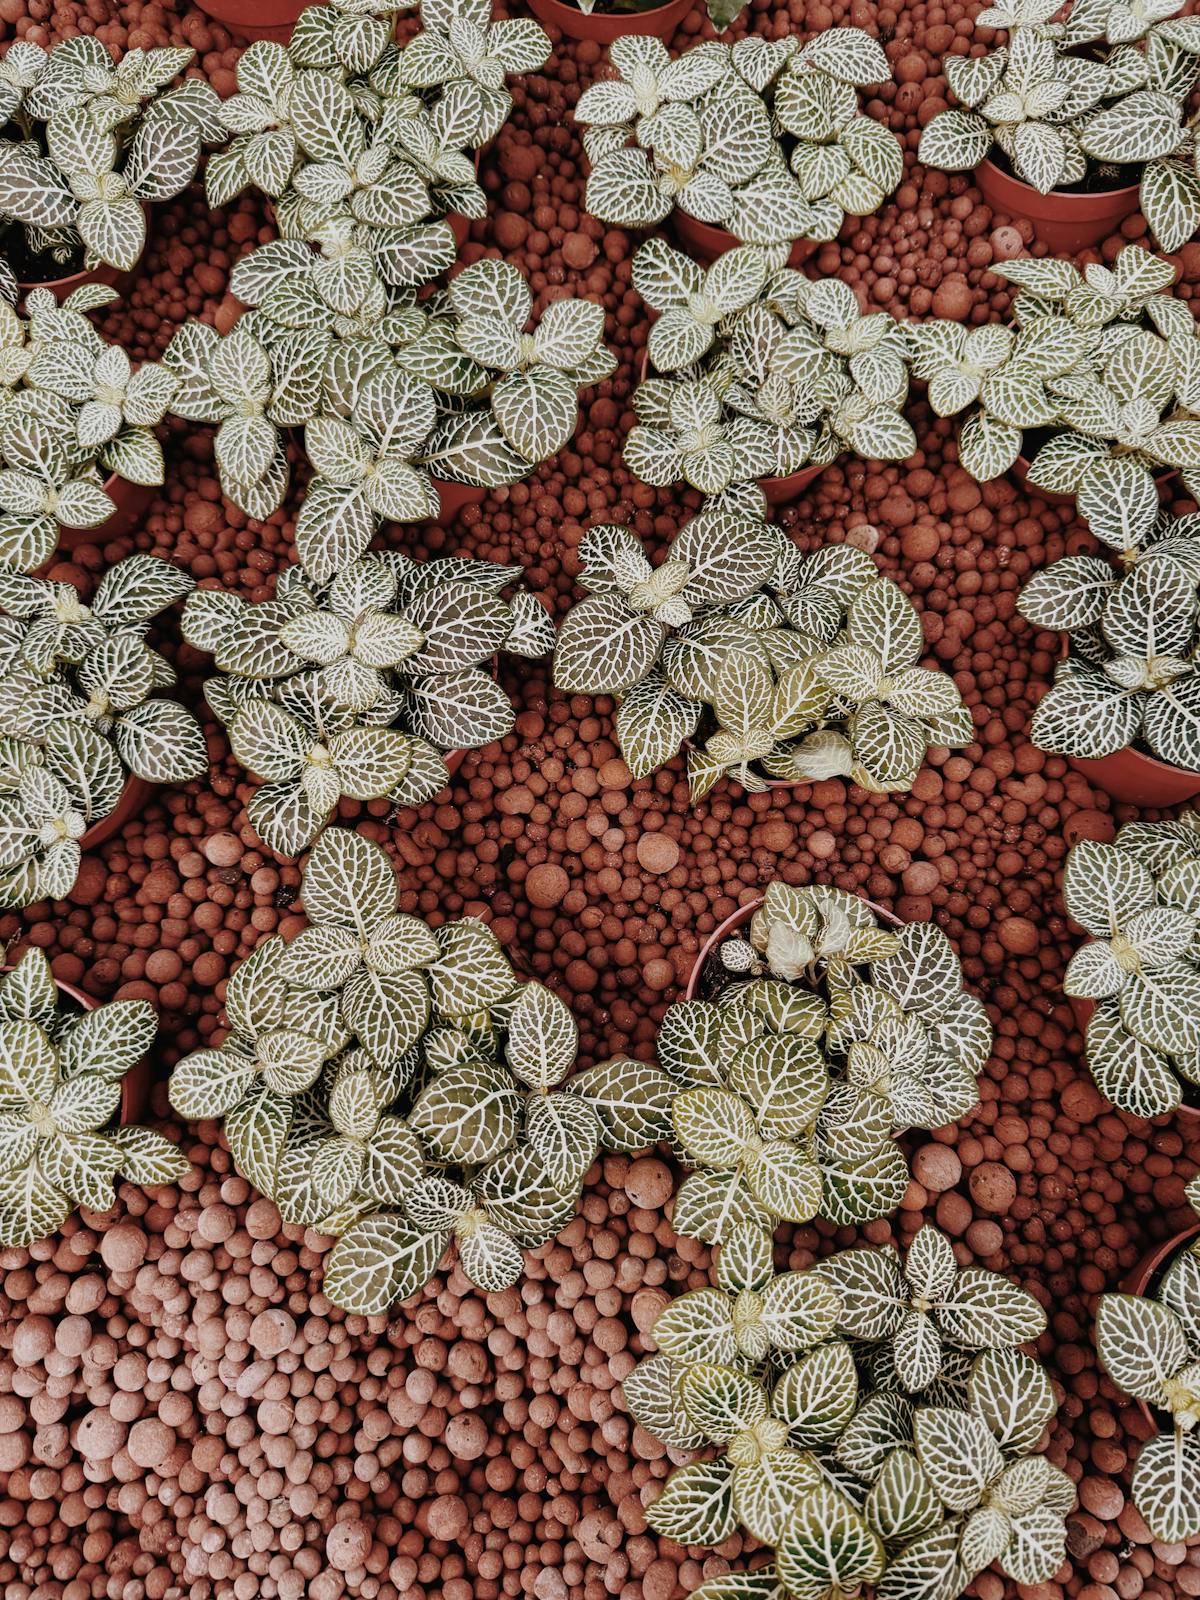
Inter-pebble macro-pores (gas exchange). Spherical pebbles cannot pack tightly. The gaps between adjacent pebbles are 3–8 mm wide — far larger than the air-filled porosity of any potting mix — and remain permanently air-filled even when the reservoir is full. Root respiration and the diffusion of CO₂ away from the root surface happen continuously. This is the structural reason Peperomia obtusifolia, a facultative epiphyte adapted to growing on bark and in leaf-litter with high air-filled porosity, performs well in the medium. Compacting potting mixes lose macro-porosity over months as the organic fraction decomposes; LECA does not.
The combined geometry produces a vertical moisture gradient: saturated at the bottom (reservoir contact), damp through the middle (capillary zone), dry at the top (above the wicking height). Roots distribute themselves across all three zones, with the larger water-uptake roots in the middle band and the oxygen-seeking root tips along the surface.
2. The Reservoir Protocol — pH, Nutrient Solution, Flushing
Because LECA contributes no minerals, no microbiota, and no pH buffering, every chemical parameter is set by the water you pour in. The reservoir is the entire growing system, and three variables determine whether the plant thrives or starves.
pH 5.5–6.5. Peperomia obtusifolia in semi-hydroponic culture has the same root-zone pH preference as in soil — slightly acidic. Below 5.5, aluminium and manganese mobilise into solution and accumulate to phytotoxic levels. Above 7.0 — the typical pH of tap water — iron, manganese, and phosphorus precipitate out of solution as insoluble salts, and the plant cannot absorb them despite their physical presence in the reservoir. The visible symptom is interveinal chlorosis on new growth (yellow leaves with green veins) within 3–6 weeks of an uncorrected high-pH reservoir. Use a calibrated digital pH meter — paper strips lack the precision needed below 0.5 pH units. Adjust downward with pH-down solution (phosphoric acid).
Complete hydroponic nutrient solution at 50% strength. Soil-formulated fertilisers assume substrate microbiota will mineralise organic nitrogen, mobilise phosphate from chelated forms, and supply micronutrients from organic decomposition. None of those processes happen in LECA. Use a 3-part or 2-part liquid hydroponic system such as the General Hydroponics Flora Series that supplies all 13 essential mineral nutrients in immediately bioavailable ionic form. Dilute to 50% of the manufacturer's recommended concentration — full strength is calibrated for fast-growing crops, not for a slow-growing semi-succulent. According to the Wikipedia hydroponics article, hydroponic nutrient formulations are the bench-tested basis of modern soilless culture; substituting general-purpose houseplant fertilisers consistently produces deficient plants.
Reservoir water level — the 1/3 rule. Fill so the water occupies the bottom 1/3 of the cachepot or net pot. The upper 2/3 remains dry and aerated; the plant's crown (where stems meet roots) sits well above the water line. Crown contact with standing water provides the entry condition for soft-rot bacteria and stem rot on this species. Allow the reservoir to drop to nearly empty before refilling. The dry-down cycle is not optional — stagnant water in a continuously-topped-up reservoir becomes anaerobic within 5–7 days, and the lower roots develop the same anoxic damage seen in over-watered soil pots.
Monthly system flush. Every 4 weeks, take the inner pot to a sink and run 3–5× the pot volume of plain pH-adjusted water through the LECA from above, allowing free drainage out the bottom for at least 60 seconds. This removes the mineral residues that accumulate as water evaporates from the upper pebbles — efflorescent white crust on the upper LECA layer is the visible signal that the flush is overdue. Empty the cachepot completely, then refill with fresh pH-adjusted nutrient solution. Salt accumulation past 3–4 months compromises root osmotic potential — the first leaf-symptom is tip browning on older leaves while new growth remains normal.
3. Setup and Substrate Preparation
The physical setup is straightforward but the preparation matters. Fresh LECA from the bag is dusty and pH-elevated, and using it untreated produces the most common first-month failures.
Equipment. A pair of pots — an inner net pot or nursery pot for the LECA and plant, and an outer waterproof cachepot to hold the reservoir. Net pots (Vivosun-style slotted plastic pots) maximise reservoir-LECA contact and are the conventional choice; standard nursery pots with multiple drainage holes also work. The outer cachepot must be opaque — clear glass jars allow light to reach the reservoir, which triggers algae growth within 7–10 days and consumes dissolved oxygen the roots need.
LECA preparation. Rinse Mother Earth Hydroton or equivalent pebbles in a colander until the runoff is clear of clay dust. Boil for 10 minutes to sterilise and to begin softening the alkaline residue. Soak for 24 hours in pH-adjusted water (pH 5.5–6.0) — the soak both pre-hydrates the internal micro-pores so capillary rise begins immediately on setup, and brings the surface chemistry down from the manufactured alkalinity (typically pH 8.0–8.5 untreated) to the operating range. Skipping the soak means the first month's reservoir pH drifts upward and the plant experiences nutrient lockout before a baseline can be established.
Initial planting. Place 2–3 cm of soaked LECA in the bottom of the net pot. Position the plant so the root mass sits on this layer; backfill around the roots with additional LECA until the inner pot is full to the rim of the original soil line. The crown remains visible at the LECA surface — do not bury it. Place the inner pot inside the outer cachepot and fill the cachepot with pH-adjusted plain water (no nutrient for the first 2 weeks) to the 1/3 mark.
4. Propagation in LECA — The Cutting Protocol
LECA is the most controlled medium available for propagation of Peperomia obtusifolia cuttings. The combination of sterile substrate, capillary moisture, and the ability to inspect roots non-destructively makes it preferable to soil propagation for most growers.
Cutting preparation. Select a stem segment with at least one node and 2–3 leaves; cut cleanly 0.5 cm below the node with a sterilised blade. Allow the cut surface to callous for 24–48 hours in still indoor air at 18–24 °C. Cinnamon dusting on the cut is acceptable as an antifungal precaution but is not a substitute for callous formation — the propagation literature on this species is well-summarised in the stem-cutting propagation guide.
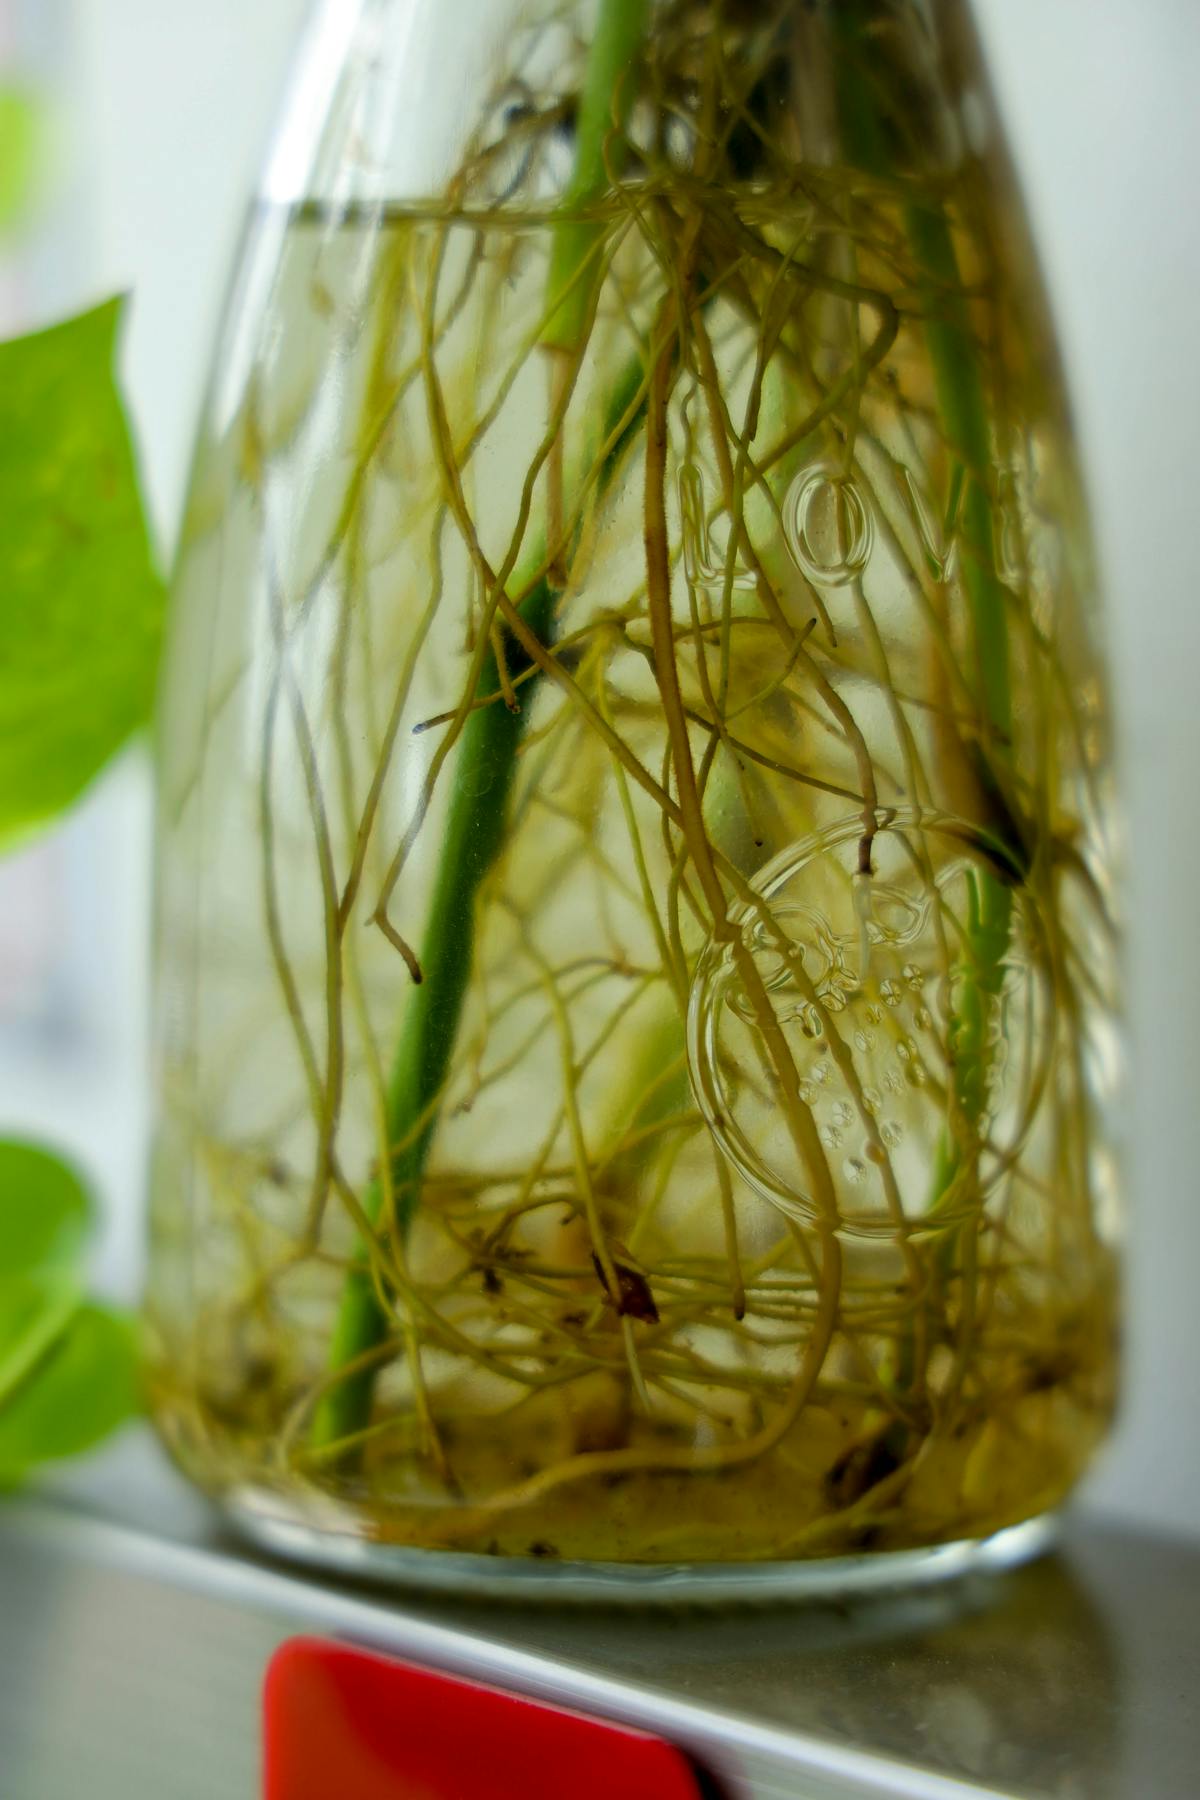
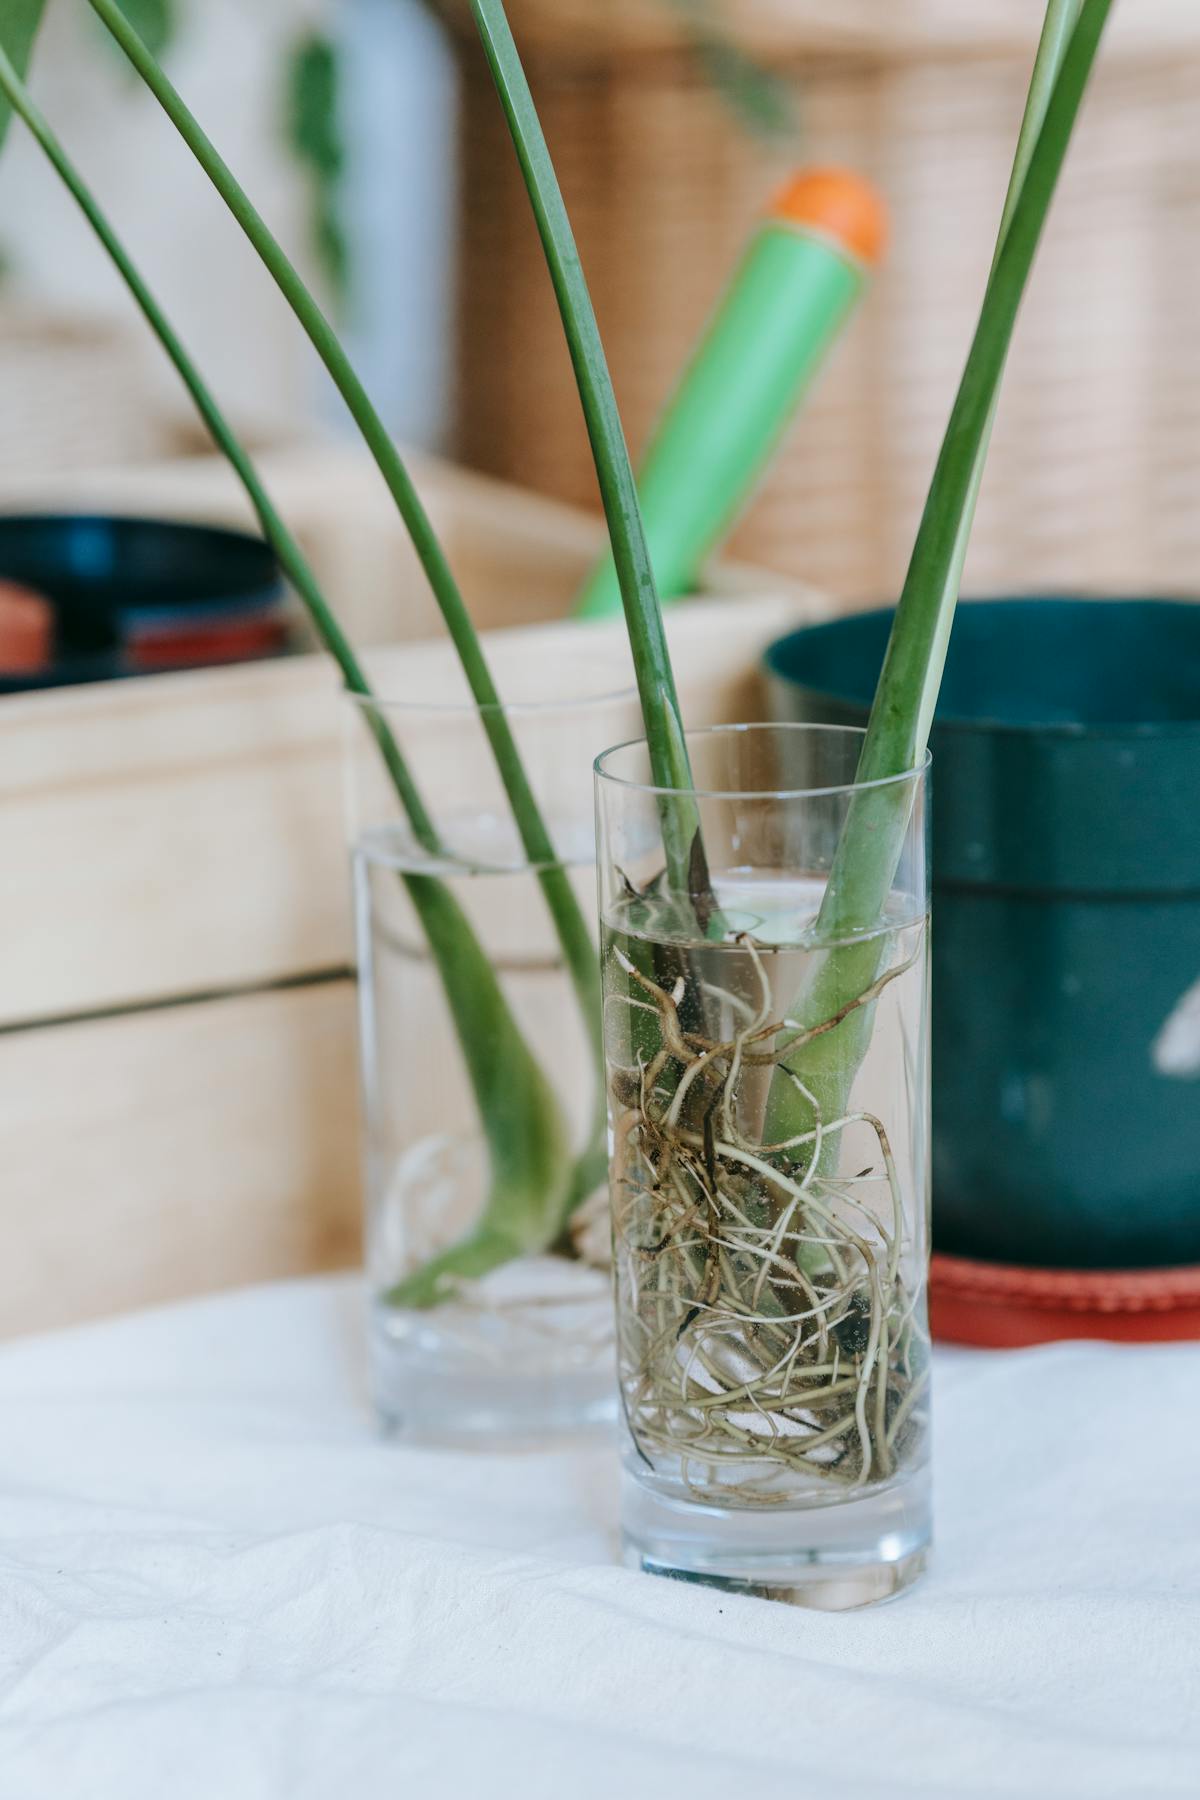
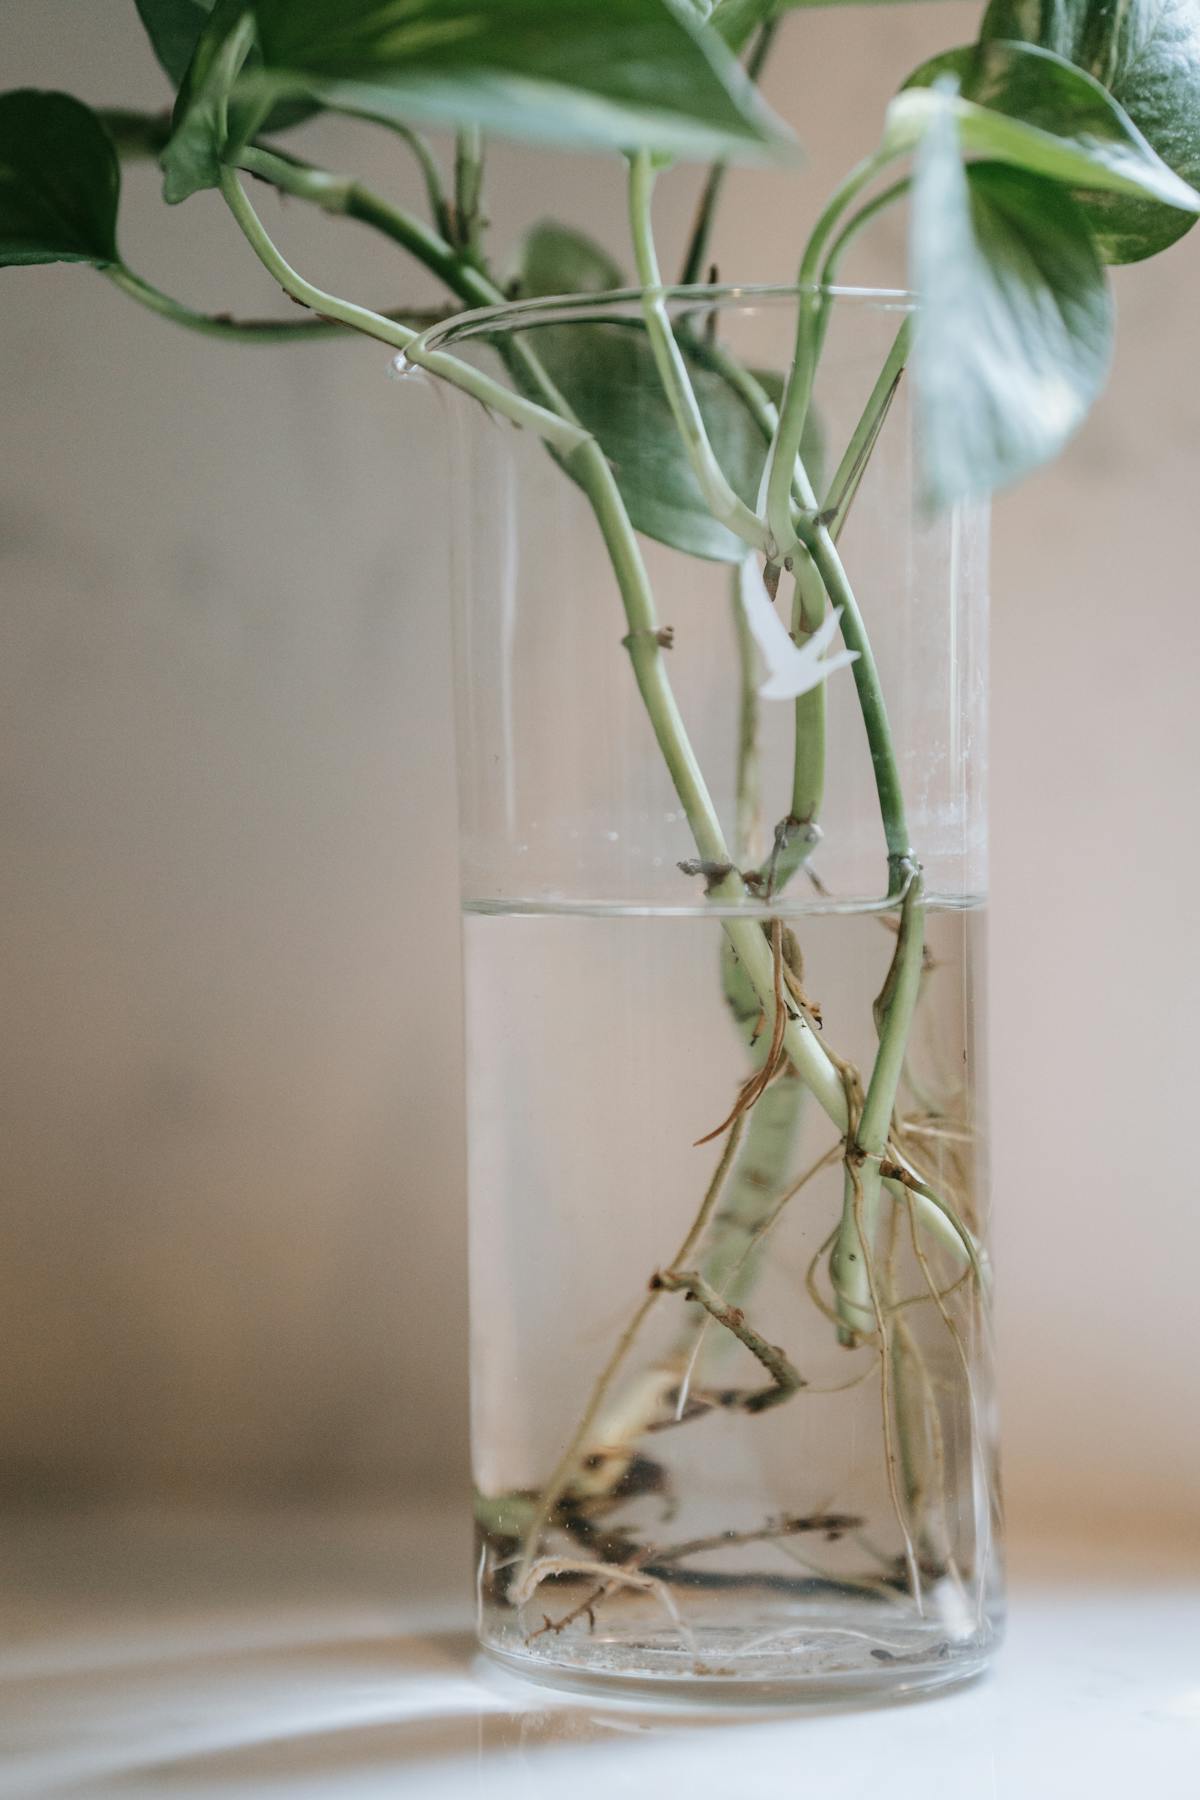
LECA jar setup. Use a clear glass jar at this stage — visibility of root development is the value of glass for propagation, and the algae risk is tolerable over the short rooting window. Fill the lower 1/3 with pre-soaked LECA. Add pH-adjusted water (5.5–6.0) to half the LECA depth — water sits below the pebble surface, not above. Place the cutting so the node rests on the pebble surface but is not submerged; surround the stem with additional dry LECA to hold it upright.
Rooting timeline. White, fuzzy water roots emerge from the node within 10–14 days at 22–24 °C; longer at lower temperatures. The roots that develop are anatomically distinct from soil roots — they contain aerenchyma, a spongy tissue with internal air channels that transports oxygen from the leaves down to submerged root segments. This adaptation is why cuttings rooted directly into LECA almost never undergo the "transition shock" experienced by mature soil-grown specimens moved into LECA — the cutting builds water roots from scratch rather than rebuilding from soil roots.
Nutrient introduction. Use plain pH-adjusted water for the first 2 weeks. Introduce nutrient solution at 25% strength at week 3, increasing to 50% by week 6 — by that point the cutting has established a functioning root system and can use mineral nutrients without osmotic-stress risk.
5. LECA vs Pon — Choosing the Substrate
Both substrates fall within the semi-hydroponic category and both work for Peperomia obtusifolia. The difference is geometric and chemical, and the choice depends on the specimen.
| Criterion | LECA | Lechuza Pon |
|---|---|---|
| Particle size | 10–25 mm clay pebbles | 2–10 mm blend of pumice, zeolite, lava rock |
| Capillary rise | 5–8 cm | 8–12 cm (finer pores, stronger wicking) |
| Macro-porosity | Highest — large air gaps between pebbles | Lower — finer particles pack tighter |
| Initial preparation | Rinse, boil, 24 h pH-soak required | Use directly from bag |
| Fertiliser | None — supply via reservoir | Slow-release fertiliser pre-mixed |
| pH at setup | 8.0–8.5 (must be adjusted down) | ~6.5 (close to target) |
| Reusability | Indefinite (boil to sterilise) | Limited — fertiliser fraction depletes |
| Best for | Long stem cuttings, mature plants | Short cuttings, small specimens |
Choose LECA when the cutting is a long stem with two or more nodes, or the plant is a mature specimen with an established root system. The large macro-pores match the airflow requirements of thick, rot-prone stems and the medium provides a clean grow-out environment for many years.
Choose Pon when the cutting is short, has a single node, or is a leaf-with-petiole rooting. The finer particles wick water further upward, keeping the node hydrated in geometries where LECA's larger gaps would leave the cutting dehydrated. The pre-mixed fertiliser is a complication during the first 2 weeks of propagation — rinse Pon thoroughly in a sieve before use on a fresh cutting to wash away the surface-coated fertiliser beads that would otherwise contact unrooted cells. Once rooted, the same Pon supplies nutrients for several months without a separate hydroponic solution.
A common error is treating the comparison as ideological — "LECA is purer", "Pon is more advanced". Neither is true. The substrates are tools matched to different geometries; both are correct for the cases they fit.
6. Maintenance, Failure Modes, and Reusability
Routine. Refill the reservoir when it drops to nearly empty (typically every 5–10 days indoors, depending on transpiration). Check pH at every refill. Flush the system every 4 weeks. Replace nutrient solution monthly. The total time investment per plant is approximately 5 minutes per week plus 10 minutes per month.
Common failures and corrections.
- Yellow leaves with green veins (interveinal chlorosis). pH lockout — reservoir has drifted above 7.0. Flush with pH 5.8 water and refill with adjusted nutrient solution. Recovery on new growth within 3–4 weeks; existing chlorotic leaves do not re-green.
- Algae growth on LECA surface or in reservoir. Light reaching the substrate. Switch to opaque cachepot; clean the inner pot and replace nutrient solution. Algae does not directly harm the plant but consumes dissolved oxygen and competes for nutrients.
- White crust on upper pebbles. Salt accumulation. Flush overdue — run 5× pot volume through from above immediately, then resume monthly flushing schedule.
- Stem softening at the LECA surface. Crown is in contact with the reservoir or with persistently wet upper pebbles. Lower the water level; reposition the plant so the crown sits 1 cm above the moist zone. Soft tissue does not recover — prune above the soft section if necessary; the cutting will re-root readily.
- Reservoir water turns dark or smells sour. Anaerobic conditions from over-topping. Empty completely; flush; allow full dry-down before refilling. Avoid topping up before the reservoir is nearly dry.
Reusability. LECA is functionally permanent. When a plant is removed, separate the pebbles from any root residue, rinse in a colander, and boil for 10 minutes to sterilise. Re-soak in pH 5.5 water for 24 hours before the next planting. A bag of LECA purchased once can serve five to ten generations of pot turnovers before mechanical breakdown reduces individual pebbles to grit. The economics — and the reduced waste compared with peat-based substrates — are part of the substrate's long-term appeal.
Conclusion
LECA suits Peperomia obtusifolia because the substrate replicates the macro-porosity of the species' native epiphytic root zone. Capillary rise through the internal micro-pores delivers water; the inter-pebble macro-pores deliver oxygen. The catch is that the inert substrate buffers nothing — every nutrient, every pH adjustment, and every salt removal is the grower's responsibility, on a fixed cadence rather than on observation alone. Once those parameters are held (pH 5.5–6.5, 50% nutrient strength, lower-1/3 reservoir depth, monthly flush) the system is more predictable than soil for this species. The medium pairs with the soil→LECA transition protocol for mature plants and with the cutting-in-LECA propagation method described above; both are direct applications of the same physics. For the question of when LECA is the wrong choice — primarily, growers unwilling to commit to weekly pH and reservoir checks — the answer is to remain with a free-draining soil mix and bottom-watering, where soil chemistry forgives some of the same intervals that LECA punishes.
Related semi-hydroponics resources:
- Soil → LECA Transition Protocol — Water Roots and the Root Scrub
- Stem-Cutting Propagation — Cutting Selection and Callousing
- Fertiliser for Peperomia obtusifolia — Soil and Hydroponic Comparisons
- Root Rot Diagnostics — Anaerobic Failure in Saturated Substrate
- Wikipedia: Expanded Clay Aggregate — Manufacturing and Applications
- Wikipedia: Aerenchyma — The Water-Root Tissue Adaptation
Care FAQ
What is LECA and why does it work for Peperomia obtusifolia?
LECA (lightweight expanded clay aggregate) is fired clay pebbles produced at approximately 1,200 °C (2,190 °F) — the high-temperature gas-expansion process leaves each pebble honeycombed with sealed micro-pores while the spherical exterior creates large air gaps between pebbles when stacked. The result is a substrate that wicks water upward by capillary action through the micro-pores while maintaining permanent macro-pores for root respiration. Peperomia obtusifolia is a facultative epiphyte that in its native neotropical understorey grows on bark and in leaf litter — substrates with continuously high air-filled porosity. LECA replicates that root-zone condition more closely than any potting mix.
What pH should I maintain in the LECA reservoir?
Target 5.5–6.5 for Peperomia obtusifolia. Below 5.5 the rhizosphere acidifies and aluminium and manganese become more bioavailable than the plant tolerates; above 7.0 iron, manganese, and phosphorus precipitate out of solution and the plant develops interveinal chlorosis (nutrient lockout) despite a nutrient-rich reservoir. Tap water from most municipal supplies is 7.0–8.5; pH-down (phosphoric or citric acid) is therefore required before every reservoir refill. Measure with a calibrated digital pH meter; paper strips lack the precision needed for hydroponic management.
Can I use regular houseplant fertiliser in LECA?
No. Soil-formulated fertilisers (Miracle-Gro and similar) rely on substrate microbiota to mineralise nitrogen and to mobilise phosphate from chelated forms. LECA is inert and sterile; those microbial conversions do not happen. Use a complete hydroponic nutrient solution that supplies all 13 essential mineral nutrients in immediately bioavailable ionic form, including the micronutrients (Fe, Mn, Zn, Cu, B, Mo) that soil-formulated products often omit. Dilute to 50% of the manufacturer's recommended concentration — P. obtusifolia is a slow grower and full-strength solutions risk osmotic stress at the root surface.
How high should the water level in the LECA reservoir be?
The water should occupy the lower 1/3 of the cachepot or net pot. Capillary rise through the LECA delivers moisture upward; the upper 2/3 remains air-filled and dry. The plant's crown — where stems meet roots — must never sit in standing water, as the bacteria that cause stem rot on this species require sustained wet-tissue contact to establish. Allow the reservoir to drop to nearly empty before refilling — the resulting dry-down cycle re-oxygenates the rhizosphere and prevents anaerobic conditions in the lower pebbles.
How often does the LECA reservoir need to be flushed?
Every 4 weeks, run 3–5× the pot volume of plain pH-adjusted water through the LECA from above, allowing it to drain completely out of the drainage hole. Then refill the reservoir with fresh pH-adjusted nutrient solution. The flush removes accumulated mineral salts (from both the nutrient solution and any tap-water residues) that deposit on the pebbles as water evaporates. Without monthly flushing, salt concentration rises within 3–4 months to levels that compromise root osmotic potential — first symptom is leaf-tip browning on older leaves while new growth remains normal.
Should I choose LECA or Pon for Peperomia obtusifolia?
Both work; the choice depends on stem geometry. LECA pebbles (10–25 mm) create the largest macro-pores and suit long stem cuttings and mature plants — the airflow around thick stems matches the species' epiphytic root-zone preference. Lechuza Pon (a 2–10 mm blend of pumice, zeolite, lava rock, and slow-release fertiliser) has finer particles and stronger capillary rise — it suits short cuttings and small specimens where a single node must remain in the moist zone. Pon arrives pre-charged with fertiliser, which complicates nutrient management on freshly-rooted cuttings; rinse thoroughly before propagating in it.
How do I propagate Peperomia obtusifolia cuttings in LECA?
Take a stem cutting with at least one node and 2–3 leaves; allow the cut surface to callous for 24–48 hours. Rinse and pre-soak LECA pebbles in pH-adjusted water for 24 hours. Half-fill a clear glass jar with LECA, add water to the lower 1/3, set the cutting so the node rests on the pebbles but is not submerged, and top up with dry LECA to support the stem. Water roots emerge from the node within 10–14 days at 22–24 °C. Hold off on nutrient solution for the first 2 weeks; introduce 25% strength at week 3, increasing to 50% by week 6.
Can fungus gnats infest LECA?
No. Sciaridae females require organic substrate at >50% moisture in the upper 1 cm of growing medium for egg deposition; LECA is inorganic, sterile, and the upper pebbles are dry. The medium is structurally hostile to oviposition and contains no organic matter for larvae to feed on. This is one of the strongest practical arguments for the medium on a Peperomia obtusifolia — see the substrate-first fungus-gnat protocol for the comparable soil-side intervention.