
When to Repot Peperomia: 7 Clear Signs
When should you repot a Peperomia obtusifolia? The reliable trigger is a combination of signs — roots at the drainage holes, water running straight through the substrate, slow turgor recovery after watering, and stalled growth in the active season — not any single symptom on its own. Because this species has a small, thready root system adapted to shallow bark crevices, it prefers a snug fit and typically only needs a larger home every 2-3 years.
In the world of tropical houseplants, Peperomia obtusifolia is a notable exception to the "repot every spring" rule. A Monstera or Philodendron might demand a new pot every six months; this plant is a facultative epiphyte adapted to the constrained root volume of rock crevices and tree bark, where a few hundred millilitres of substrate drains within hours and stays aerated. For this species, a pot that is too large is not an upgrade — it is a liability. Excess substrate around a small root ball retains moisture the roots cannot reach, creating the anaerobic "dead zone" behind most repotting-induced root rot. The site's position, in line with opinions.md, is unambiguous: do not repot annually. Repotting more often than every 2-3 years compounds transplant shock and destroys the high-oxygen root environment the plant has already established.
The 7 Signs Your Peperomia Needs Repotting
Read these as a combination, not a checklist to tick off one at a time. Two or more signs appearing together — especially across different categories (hydraulic, foliar, and mechanical) — indicate a genuine need to repot. One sign alone, particularly the first, is often not enough on its own.
| Sign | Category | Alone or combined? |
|---|---|---|
| Roots at the drainage holes | Mechanical | Tolerate alone for 6–12 months |
| Water runs straight through | Hydraulic | Watch for a second sign |
| Turgor recovery over 24 hours | Hydraulic | At threshold — repot |
| Growth stalled 2+ months in season | Foliar | Watch for a second sign |
| New leaves noticeably smaller | Foliar | At threshold — repot |
| Pot distorted or root ball lifted | Mechanical | At threshold — repot |
| Watering interval down to 2–4 days | Hydraulic | Watch for a second sign |
- Roots emerging from the drainage holes. The lowest-severity signal and the one growers panic over first. A few firm white root tips poking through is closer to a normal feature of a mature container plant than an emergency — this species tolerates it for 6-12 months. A dense tangle circling the base is a stronger signal.
- Water runs straight through without being absorbed. If water pours out of the drainage holes almost instantly while the topsoil stays dry, the root-to-soil ratio has inverted: roots have physically displaced the substrate, leaving too little soil left to hold moisture.
- Post-watering turgor recovery takes longer than 24 hours. This is the real hydraulic-failure trigger, not the roots-from-holes sign most people watch for. If leaves stay soft and slightly limp a full day after a thorough watering, water is running through channels in the root mass rather than reaching the tissue that needs it.
- Growth has stalled for two months or more in the active season. If it is spring or summer, the plant is receiving 2,000-4,000 lux, and you are fertilising on schedule, but no new growth has appeared, the root system likely has no foundation left to support new foliage.
- New leaves emerge noticeably smaller than older ones. This is an allometric response — the plant is rescaling its canopy to match what a constrained root system can hydraulically support. It is not a nutrient deficiency, so increasing fertiliser will not fix it.
- The pot is visibly distorted, or the root ball has lifted above the rim. A flexible plastic nursery pot turning oval instead of round means roots are exerting real outward pressure. A root ball heaving up above the pot's lip has gone past that threshold entirely.
- Watering interval has shortened from every 7-14 days to every 2-4 days. The substrate's water-holding capacity has been outpaced by root volume, and the plant is chronically thirsty despite frequent watering.
A frequent pattern behind sign 4 and sign 5 appearing together: an otherwise healthy specimen stops producing new growth, the new leaves that do appear are visibly smaller, and the owner assumes a nutrient deficiency and increases fertiliser. The canopy does not recover, because the constraint is hydraulic, not mineral — a root system that has filled the pot cannot deliver additional nutrients to leaves it cannot adequately water. The fix is a one-inch pot upsize, not more fertiliser.
Why a Moderately Root-Bound Plant Isn't an Emergency
It helps to understand why this species tolerates the early signs so well before repotting reflexively at the first root tip. In its native range, P. obtusifolia roots into bark crevices and leaf-litter pockets that hold a few hundred millilitres of substrate at most — spaces that drain within hours and stay aerated. A moderately root-bound plant in a pot is approximating that native constraint: the smaller water reserve dries down quickly, keeping the root zone oxygenated and reducing the multi-day saturation that root rot needs to take hold. That is the reasoning behind the site's position against annual repotting — the plant is not being deprived by a snug pot, and disturbing an established root system before it has genuinely outgrown its space trades a stable rhizosphere for weeks of avoidable transplant recovery.
The One-Inch Rule and Pot Selection
When it is finally time to pot up, the single most common mistake is giving the plant a palace.
- The rule: Increase pot diameter by exactly one inch (2.5 cm) — a 12 cm pot moves to 15 cm, not 20 cm. Resist sizing up further even if a bigger pot looks proportionally nicer.
- The logic: A pot significantly larger than the current root ball creates a dead zone of soil that retains far more water than the roots can draw down. That standing moisture produces the anaerobic conditions behind most container-grown root rot in this species — the same failure mode covered in the overwatering rescue guide.
Pot material matters. For growers prone to overwatering, unglazed terracotta is the better choice — the porous walls allow evaporative cooling and moisture wicking, providing a passive failsafe against soggy soil. Plastic or glazed ceramic retains moisture longer and demands a more disciplined watering hand. The trade-offs for each, including which suits a dry versus humid room, are covered in the best pots for Peperomia guide.
Refreshing the Foundation: Soil and Salt Management
Even if your Peperomia isn't severely root-bound, consider a substrate refresh every 2-3 years.
- Soil depletion: Over time, the organic components in a standard Peperomia soil mix decompose and compact, reducing the air-filled porosity the roots need to breathe.
- Mineral salt buildup: Tap water and liquid fertilisers gradually leave mineral salts in the substrate, often visible as a white crust on the surface. These salts pull water out of root cells osmotically rather than letting it in. Repotting is the natural point to clear this and re-establish a clean, pH-balanced environment (6.0-6.5).
Once You've Decided to Repot
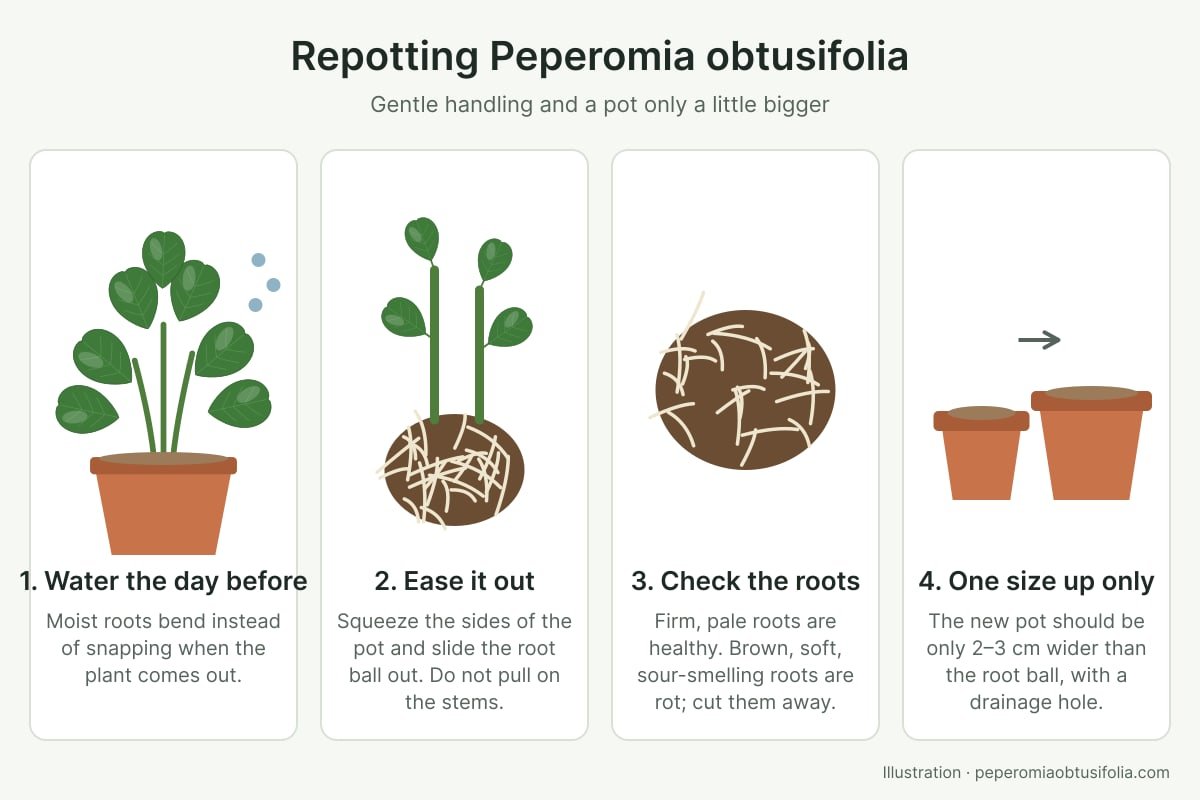
This page is about deciding whether to repot. The actual procedure (watering the day before, easing the root ball out, cleaning an old pot, and how much to trim circling roots) is in the how to repot Peperomia guide.
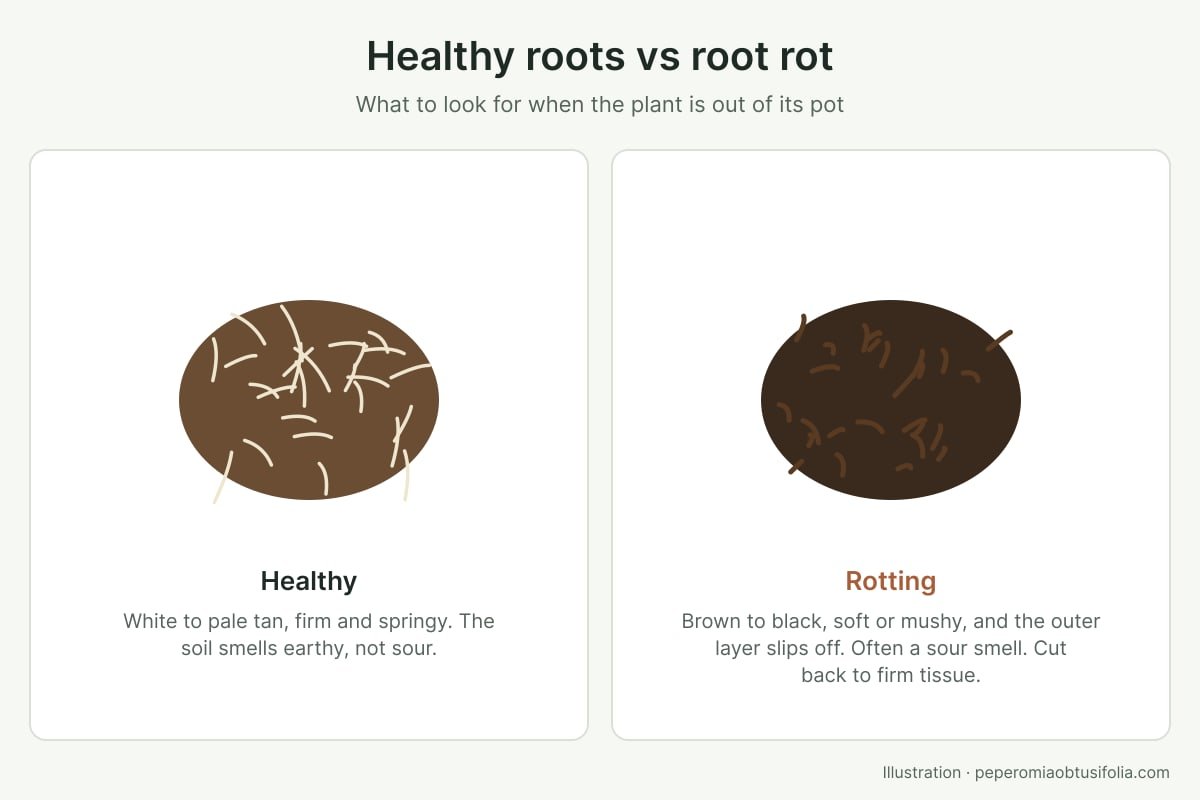
One check belongs here, because it changes the decision itself: when the plant is out of the pot, look at the roots. Healthy roots are white to pale tan and firm. Brown, soft roots with a sour smell mean rot, not crowding, and a bigger pot will not fix that. Follow the root-rot recovery steps instead.
Root Pruning as an Alternative to Sizing Up
For a specimen that has reached the signs above but where the goal is to keep the plant at its current size — a display piece in a fixed spot, or simply a preference for the current proportions — root pruning replaces the pot upsize. Unpot as in Step 2, then use sterile shears to remove roughly 1-2 cm from the bottom of the root ball and a similar amount from the outer perimeter, working around the full circumference rather than concentrating the cut in one spot. Return the trimmed root ball to the same pot with fresh substrate filling the gaps left behind, and water in as normal. Expect the same 4-6 week growth pause as a conventional repot while fine feeder roots regenerate, after which growth resumes at a slightly reduced rate matching the smaller root system. This is well tolerated on the same 2-3 year interval as a standard repot, and is the standard technique for keeping a mature specimen at a fixed size indefinitely rather than progressively sizing up.
Post-Repotting Aftercare: The Recovery Phase
The first 14 days after repotting are critical for root initiation.
- Hold the fertiliser: Fresh substrate contains enough nutrients on its own. Adding liquid fertiliser too soon can burn sensitive new root tips — wait 4-6 weeks before resuming feeding.
- The watering pause: If the new mix was pre-moistened, wait 2-3 days before the first watering, giving minor root injuries time to callus over and reducing the risk of fungal entry.
- Light acclimation: Keep the plant in bright indirect light at 2,000-4,000 lux, avoiding direct sun for the first week, so it can focus energy on root development rather than photosynthesis.
- Expect a growth pause: A 4-6 week stall in new growth after repotting is normal recovery, not a sign of a failed repot.
Conclusion
Repotting is a necessary upgrade for Peperomia obtusifolia, but it has to be earned by the plant's own signals rather than a date on the calendar. Wait for two or more of the seven signs to appear together, hold to the one-inch pot upsize, and give the plant a 4-6 week recovery window afterward — that combination protects the high-oxygen root environment this species depends on while still giving it room to grow.
Care FAQ
How do I know when to repot my Peperomia?
Look for two or more signs together, not one in isolation: roots emerging from the drainage holes, water running straight through without being absorbed, post-watering turgor recovery taking longer than 24 hours, growth stalled for two months or more in the active season, new leaves noticeably smaller than older ones, or a visibly distorted pot. A single emerging root alone is not a trigger — Peperomia obtusifolia tolerates that state for 6-12 months. Generally, expect to repot every 2-3 years.
Is a root-bound Peperomia a problem?
Not at moderate levels. As a facultative epiphyte adapted to shallow bark crevices and leaf litter, Peperomia obtusifolia evolved with constrained root volume, and a moderately root-bound state increases oxygen availability at the root surface and speeds dry-down between waterings. It becomes a problem only once the root mass has displaced enough substrate that water can no longer be held at all - the hydraulic-failure threshold described above.
How much bigger should the new pot be?
Increase the diameter by exactly one inch (2.5 cm) - a 12 cm pot moves to 15 cm, not 20 cm. A larger jump buries the existing root ball in a volume of substrate it cannot yet draw down, and that unused water sits in an anaerobic "dead zone" that is the most common cause of repotting-induced root rot.
What are the biggest mistakes when repotting?
The two most common errors are over-potting (choosing a pot more than one inch larger in diameter, which leads to root rot) and repotting a bone-dry plant. Hydrate the plant 24 hours before moving it, and resist the urge to "size up" more generously than the one-inch rule allows.
Can I repot Peperomia obtusifolia in winter?
Avoid it unless the plant is in active root failure. Between November and February growth is near zero in most homes, so the plant cannot regenerate damaged roots quickly and sits in freshly watered substrate it is not using. Wait for the spring metabolic restart in March-April.