How to Propagate Long Peperomia Vines: Multi-Node Sections
Propagate long peperomia vines by treating each trailing stem as a chain of 2-node cuttings: cut just below a node, strip the lower leaf for a rooting zone, keep at least one leaf for photosynthate, orient the basal end down, and root in water or a perlite-heavy mix at 18–24 °C. A single ~30 cm vine with nodes every 3–4 cm typically yields 5–8 independent plants — tip pieces root fastest (adventitious roots; plant propagation; species context: NC State).
Why the vine stretched belongs in fix leggy peperomia. Single-cutting mechanics belong in stem cutting propagation. This article is the multi-section yield protocol for long trailing material — how to turn one prune into a tray of cuttings without wasting leafy nodes on bare-stick experiments.

1. When a Long Vine Is a Propagation Asset
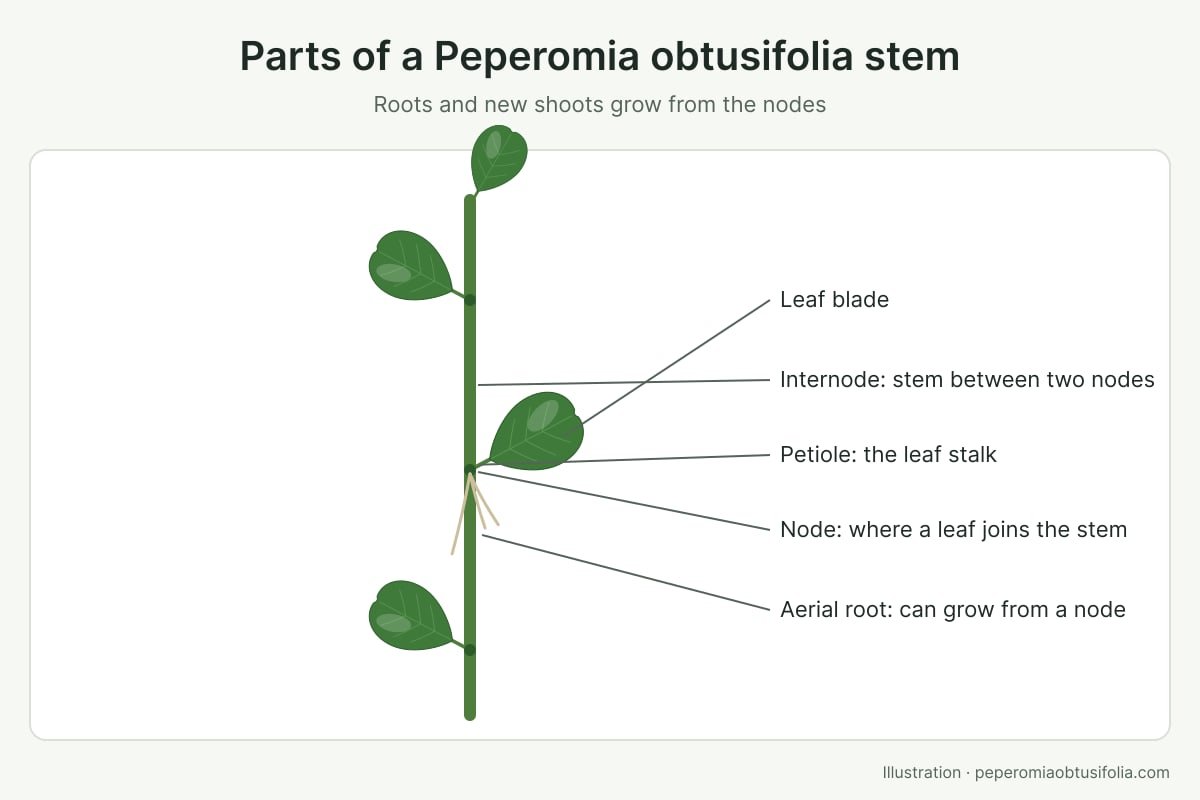
Peperomia obtusifolia often shifts from upright to decumbent / trailing with age (size & habit; RHS). Etiolation under chronic low light stretches internodes from ~1–2 cm toward 4–6 cm — Pattern: elongated internodes, smaller new leaves, lean toward the window. That stretch is permanent in existing tissue, but every node still holds meristem capable of adventitious roots and a new shoot.
Use this protocol when you have a long leafy trailer you are already pruning for shape. Do not use it as an excuse to keep the mother below ~1,000 lux — you will recreate the vine.
Work in spring or early summer when possible: warmer rooms and higher DLI speed root initials on every section. If the vine is the only healthy tissue left after crown rot, section only firm green lengths and discard anything translucent or sour-smelling.
2. Propagate Long Peperomia Vines: 5 Proven Steps
Step 1 — Map nodes. Lay the vine flat. Mark each node (leaf attachment or scar). Skip soft, yellow, or pest-damaged segments.
Step 2 — Plan 2-node sections. Minimum: one bare rooting node + one leafy photosynthesis node. Longer tip pieces (3–4 nodes / ~8–15 cm) are fine and often more forgiving. Prefer leafy multi-node sections over maximising bare single nodes from a leafy vine — leafless rescue is a different protocol (leafless nodes).
Step 3 — Cut below the lower node. Sterile blade. On the mother plant, finish cuts ~0.5 cm above a compact node so axillary buds can break (prune guide).
Step 4 — Strip and callus. Remove leaves that would sit in water or under the mix. Air-dry cut faces ~12–24 hours for water props, 24–48 hours for soil props (callus timing). Do not leave stripped cuttings on a hot sill during the dry-down — desiccation of the leaf canopy costs more than a short callus saves.
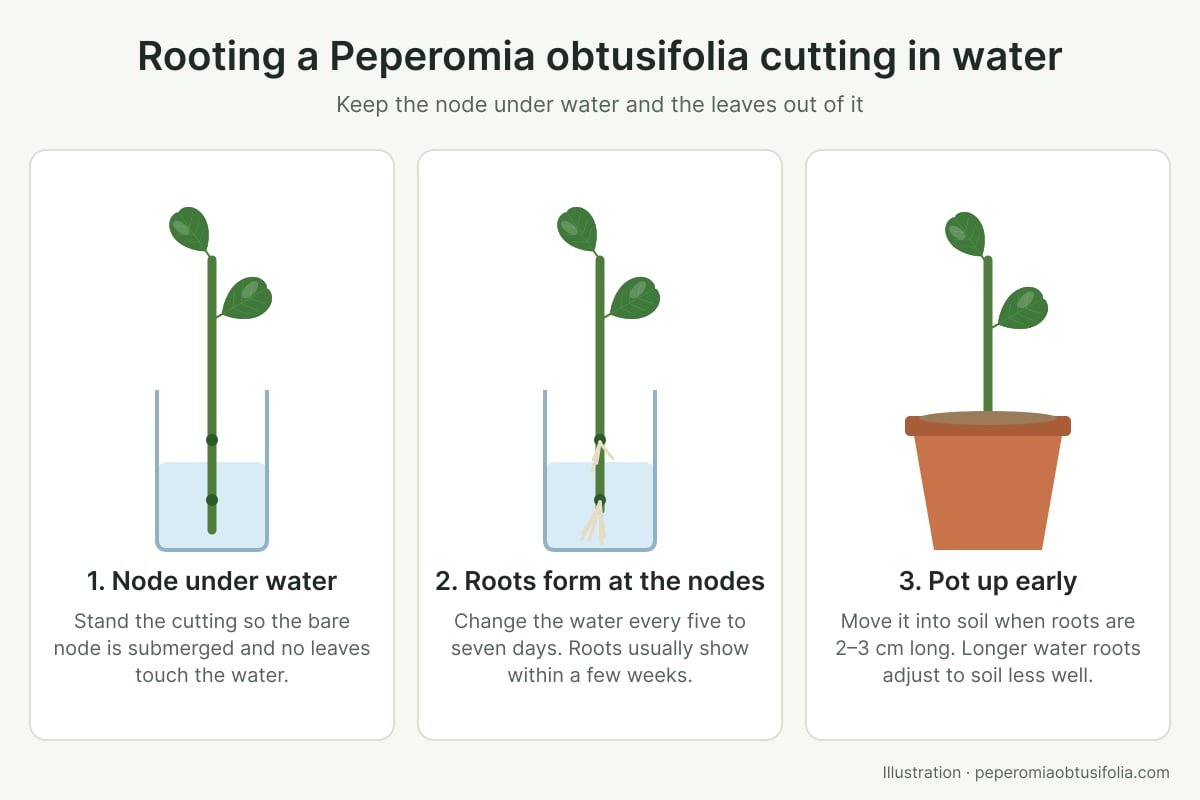
Step 5 — Root with polarity. Basal (soil-facing) end down. Water: submerge only the lower node(s); change water when cloudy. Mix: insert into damp 50/50 perlite–coir (or equivalent aeration). Hold 18–24 °C and bright indirect light (~2,000–4,000 lux at the leaf — avoid cooking jars in unfiltered sun).
Batch the jars or trays the same day you cut. Cuttings left overnight in a closed plastic bag with dry air wilt before they ever see medium; if you must pause, mist the bag lightly and keep it cool and shaded for a few hours only.
Group tip cuttings in one vessel and mid-vine pieces in another if you want a clean timing comparison. Crowding five thick stems in a narrow jar raises bacterial load and shades lower nodes — use several small jars rather than one crowded vase.
3. Water, Perlite, or Sphagnum — Pick by Goal
| Medium | Typical root timing | Strength | Best for |
|---|---|---|---|
| Water | 2–4 weeks | Fine “water roots” | Monitoring tip and mid sections |
| Perlite / airy mix | 3–5 weeks | Soil-ready | Fewer transplant steps |
| Damp sphagnum | 3–4 weeks | Strong under humidity | Stubborn mid-vine pieces |
Opinion: Rooting hormone is optional. P. obtusifolia roots readily from nodes; IBA is acceleration, not a requirement. Cinnamon or honey are not substitutes for auxin chemistry.
Water-to-soil transition is the main failure after water props: move when roots are ~2–3 cm into a free-draining mix (≥30% perlite by volume) and keep slightly more frequent moisture for 1–2 weeks (soil mix recipe; water-to-soil transition).
Yield math. Count nodes on the vine ÷ 2 (for 2-node sections), then subtract any soft or leafless scraps you discard. A 36 cm vine with a node every 3 cm has ~12 nodes → about 6 leafy cuttings if every section keeps a leaf. Pushing that to 12 bare singles shifts you into the leafless protocol and lowers odds.
4. Tip vs Mid-Vine vs Basal — Not Equal Pieces
| Section | Expectation | Watch for |
|---|---|---|
| Tip (apical meristem) | Fastest rooting (often 2–3 weeks) | Highest auxin gradient; resumes leader growth once potted |
| Mid-vine | +1–2 weeks vs tip | Upside-down polarity delays roots; notch the basal end before cutting |
| Basal (near crown) | Often already showing aerial root initials | Discard if soft from crown rot |
Spring–early summer shortens all three clocks (best time to propagate). Winter indoor props still work at 18–24 °C but expect the slow end of each range.
Troubleshooting while rooting
| Symptom | Likely cause | Action |
|---|---|---|
| Soft black base | Leaves in water / stagnant jar | Recut to firm tissue; refresh water; keep leaves dry |
| Wilted leaves, firm stem | Excess light/heat in sealed jar | Move to bright indirect; open lid briefly |
| No roots at 5 weeks | Cool room / wrong polarity | Confirm 18–24 °C; flip if basal end was up |
| Roots then collapse after potting | Dense mix / sudden dry | Use airy mix; gentle moisture for 1–2 weeks |
5. Extra: Air Layer, Variegation, and Mother Reset
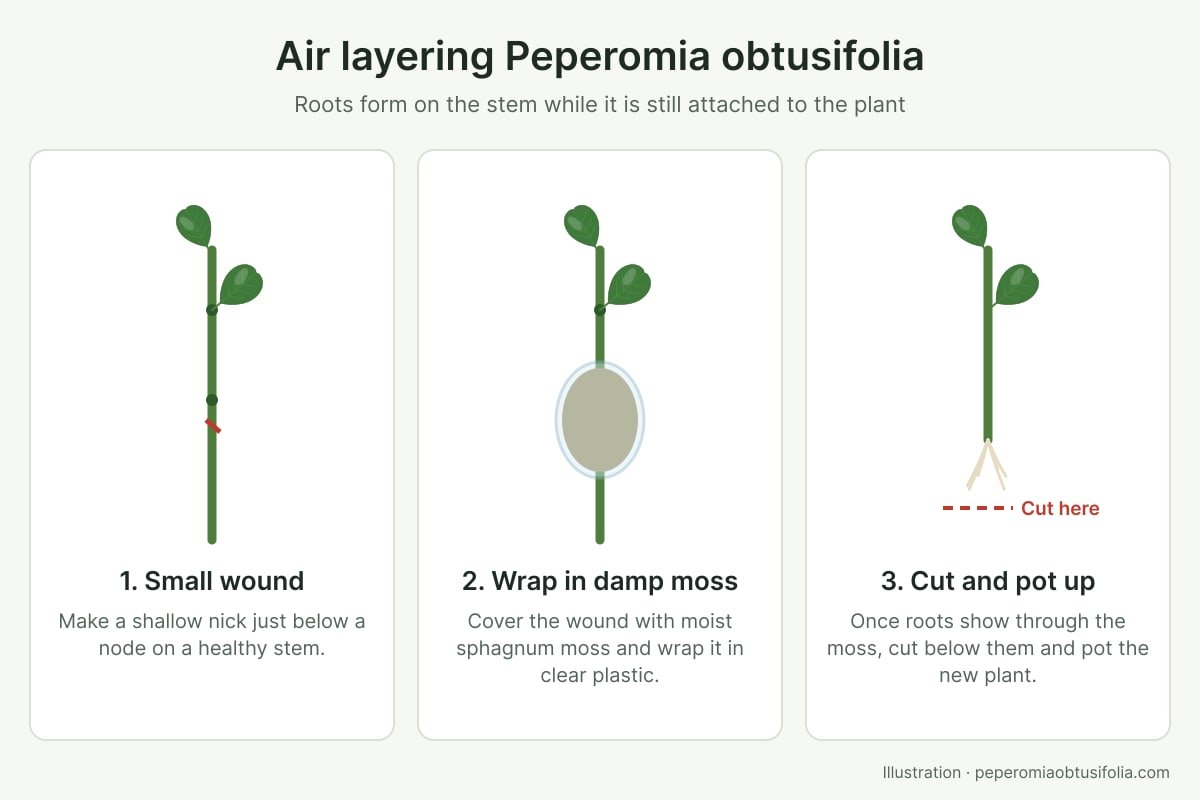
Air layer the tip when you refuse to detach rare patterned tissue until roots are visible (air layer guide). For ordinary green trailers, sectioning is faster and higher yield.
Variegated vines: only sections with a variegated node preserve chimera patterning; leaf-only pieces of these cultivars usually regenerate green (variegated nodes; Missouri Botanical Garden).
Mother reset: after the harvest, relocate the stump to 2,000–4,000 lux. Pruning without light correction only schedules the next long vine (fix leggy). Pot several rooted cuttings together in one wider pot if you want an instant bushy specimen; otherwise pot singly so each leader can be trained upright. Label tip vs mid sections if you are comparing speed — tip jars usually finish first and can be potted while mid pieces continue.
Do not fertilise until new leaves expand after potting. Early feed burns tender water-grown roots without speeding establishment. Once growth resumes, return to the species dry-down watering cycle: top 2–3 cm dry before the next drink, not a fixed weekly schedule.
Conclusion
Propagate long peperomia vines by sectioning at nodes, not composting the trailer: 2-node leafy cuts, basal end down, water or airy mix, then lux reset on the mother. Tip pieces bank the fastest wins; mid-vine pieces bank the volume — if you keep polarity and leaves attached. Once the tray is full, treat the mother as a new plant under measured light; the cuttings are replacements for the stretch you removed, not a licence to leave the stump in the shade.
Care FAQ
How many cuttings can I get from one long Peperomia vine?
Roughly one cutting per 2-node section. A 30 cm trailing stem with nodes every 3–4 cm often yields 5–8 leafy cuttings if you keep at least one leaf per piece. Maximising bare single nodes from a leafy vine raises failure rate.
Where do I cut a long Peperomia vine for propagation?
Cut just below a node with a sterile blade so meristematic tissue sits at the base of each section. Internode-only pieces rarely root. On the mother plant, leave a clean cut about 0.5 cm above a compact node so laterals can push.
Is water or soil better for long vine sections?
Water is fastest to monitor (roots often in 2–4 weeks) but needs a careful soil transition. A 50/50 perlite-heavy mix produces stronger soil-ready roots in about 3–5 weeks. Rooting hormone is optional — this species roots readily without it.
Do tip cuttings root faster than mid-vine sections?
Yes. Tip pieces carry the apical meristem and a strong auxin gradient and usually root in 2–3 weeks under 18–24 °C. Mid-vine sections need correct polarity (basal end down) and often take 1–2 weeks longer.
Should I air layer a long vine instead of cutting it up?
Air layer if you want the tip rooted while still attached, or if the tip carries irreplaceable variegation you will not risk as a free cutting. For bulk multiplication of a trailing green vine, sectioning is faster.
Will the mother plant stay leggy after I propagate the vine?
Existing elongated internodes do not shorten. After pruning, relocate the mother to 2,000–4,000 lux so new growth stays compact — otherwise you will harvest another stretched vine next season.